Trước đây, mình thường truy cập vào các máy ảo Linux thông qua giao thức SSH bằng ứng dụng trên hệ điều hành: Putty (Windows), iTerm2 (MacOS), Termius (iOS). Đối với máy ảo chạy Windows, mình sẽ sử dụng Remote Desktop có sẵn trên Windows hoặc cài thêm app RD Client trên MacOS / iOS để kết nối thông qua giao thức RDP
Gần đây khi số lượng máy ảo cần quản lý càng lúc càng nhiều hơn, mình bắt đầu gặp khó khăn trong việc ghi nhớ địa chỉ IP Address cùng thông tin đăng nhập của từng máy ảo. Do đó, mình đã phải tìm đến công cụ Apache Guacamole để quản lý tập trung các kết nối đến tất cả máy ảo. Nó thực sự là một cuộc cách mạng, giúp việc quản trị máy ảo trở nên tiện lợi và nhanh chóng hơn hẳn.
Bài viết này mình sẽ hướng dẫn cách cài đặt, cấu hình và sử dụng Apache Guacamole để kết nối đến máy ảo thông qua các giao thức: SSH, RDP, VNC
I. Giới thiệu Guacamole
Guacamole, hay tên đầy đủ Apache Guacamole là một công cụ mã nguồn mở giúp kết nối từ xa đến máy ảo, hỗ trợ các giao thức kết nối phổ biến nhất hiện nay: SSH, RDP và VNC.
Ưu điểm của Guacamole là nó không yêu cầu bạn phải cài đặt bất cứ phần mềm nào trên máy tính. Nhờ được phát triển bằng HTML5, bạn có thể truy cập Guacamole bằng trình duyệt web, trên bất kỳ thiết bị nào.
Dưới đây là tóm tắt các tính năng của Guacamole
- Truy cập máy tính từ khắp mọi nơi thông qua trình duyệt web.
- Kết nối đến desktop đặt trên Cloud một cách tiện lợi.
- Miễn phí và mã nguồn mở.
- Đi kèm bộ API giúp tích hợp với các ứng dụng khác.
- Hỗ trợ doanh nghiệp thông qua các công ty liên kết.
II. Cài đặt Guacamole bằng Docker
Guacamole gồm có hai phần: Guacamole Server và Guacamole Client. Cách cài đặt thông thường được hướng dẫn chi tiết ở đây. Tốt nhất bạn không nên xem vì nó cực kỳ rắc rối và khó hiểu.
Để đơn giản hoá, mình sẽ cài đặt Guacamole thông qua Docker, sử dụng nguồn guacamole-docker-compose. Chỉ mất vài phút là sẽ có hệ thống Guacamole sẵn sàng phục vụ.
Yêu cầu bạn phải cài đặt sẵn Docker và Docker Compose trước khi tiếp tục với các thao tác bên dưới.
1. Tải mã nguồn
Kết nối vào máy ảo Ubuntu / Debian của bạn và tải mã nguồn về máy
cd ~git clone "https://github.com/boschkundendienst/guacamole-docker-compose.git"Nếu bi báo lỗi git: command not found, bạn cần cài đặt thêm git vào máy bằng lệnh dưới đây, sau đó thực hiện lại.
sudo apt install git2. Chuẩn bị hệ thống
Truy cập vào thư mục guacamole-docker-compose và chạy script prepare.sh để hệ thống khởi tạo các file cấu hình cần thiết.
cd guacamole-docker-compose./prepare.shKết quả hiện ra sau 1-2 giây
Preparing folder init and creating ./init/initdb.sqldoneCreating SSL certificatesGenerating a RSA private key.........+++++..................+++++writing new private key to 'nginx/ssl/self-ssl.key'-----You can use your own certificates by placing the private key in nginx/ssl/self-ssl.key and the cert in nginx/ssl/self.certdone3. Chỉnh sửa docker-compose.yml
Dưới đây là nội dung mặc định của file docker-compose.yml
##################################################################################### docker-compose file for Apache Guacamole# created by PCFreak 2017-06-28## Apache Guacamole is a clientless remote desktop gateway. It supports standard# protocols like VNC, RDP, and SSH. We call it clientless because no plugins or# client software are required. Thanks to HTML5, once Guacamole is installed on# a server, all you need to access your desktops is a web browser.###################################################################################### What does this file do?## Using docker-compose it will:## - create a network 'guacnetwork_compose' with the 'bridge' driver.# - create a service 'guacd_compose' from 'guacamole/guacd' connected to 'guacnetwork'# - create a service 'postgres_guacamole_compose' (1) from 'postgres' connected to 'guacnetwork'# - create a service 'guacamole_compose' (2)  from 'guacamole/guacamole/' conn. to 'guacnetwork'# - create a service 'nginx_guacamole_compose' (3) from 'nginx' connected to 'guacnetwork'## (1)#  DB-Init script is in './init/initdb.sql' it has been created executing#  'docker run --rm guacamole/guacamole /opt/guacamole/bin/initdb.sh --postgres > ./init/initdb.sql'#  once.#  DATA-DIR       is in './data'#  If you want to change the DB password change all lines with 'POSTGRES_PASSWORD:' and#  change it to your needs before first start.#  To start from scratch delete './data' dir completely#  './data' will hold all data after first start!#  The initdb.d scripts are only executed the first time the container is started#  (and the database files are empty). If the database files already exist then the initdb.d#  scripts are ignored (e.g. when you mount a local directory or when docker-compose saves#  the volume and reuses it for the new container).##  !!!!! MAKE SURE your folder './init' is executable (chmod +x ./init)#  !!!!! or 'initdb.sql' will be ignored!##  './data' will hold all data after first start!## (2)#  Make sure you use the same value for 'POSTGRES_USER' and 'POSTGRES_PASSWORD'#  as configured under (1)## (3)#  ./nginx/nginx.conf will be mapped read-only into the container at /etc/nginx/nginx.conf#  ./nginx/mysite.template will be mapped into the container at /etc/nginx/conf.d/mysite.template#  ./nginx/ssl will be mapped into the container at /etc/nginx/ssl#  At startup a self-signed certificate will be created. If you want to use your own certs#  just remove the part that generates the certs from the 'command' section and replace#  'self-ssl.key' and 'self.cert' with your certificate.#  To debug nginx replace '&& nginx -g 'daemon off' with '&& nginx-debug -g 'daemon off'#  nginx will export port 8443 to the outside world, make sure that this port is reachable#  on your system from the "outside world". All other traffice is only internal.##  You could remove the entire 'nginx' service from this file if you want to use your own#  reverse proxy in front of guacamole. If doing so, make sure you change the line#       - 8080/tcp#   to   - 8080:8080/tcp#  within the 'guacamole' service. This will expose the guacamole webinterface directly#  on port 8080 and you can use it for your own purposes.#  Do note, guacamole is available on :8080/guacamole, not /.## !!!!! FOR INITAL SETUP (after git clone) run ./prepare.sh once## !!!!! FOR A FULL RESET (WILL ERASE YOUR DATABASE, YOUR FILES, YOUR RECORDS AND CERTS) DO A# !!!!!  ./reset.sh### The initial login to the guacamole webinterface is:##     Username: guacadmin#     Password: guacadmin## Make sure you change it immediately!## version            date              comment# 0.1                2017-06-28        initial release# 0.2                2017-10-09        minor fixes + internal GIT push# 0.3                2017-10-09        minor fixes + public GIT push# 0.4                2019-08-14        creating of ssl certs now in prepare.sh#                                      simplified nginx startup commands####################################################################################
version: '2.0'
# networks# create a network 'guacnetwork_compose' in mode 'bridged'networks:  guacnetwork_compose:    driver: bridge
# servicesservices:  # guacd  guacd:    container_name: guacd_compose    image: guacamole/guacd    networks:      guacnetwork_compose:    restart: always    volumes:    - ./drive:/drive:rw    - ./record:/record:rw  # postgres  postgres:    container_name: postgres_guacamole_compose    environment:      PGDATA: /var/lib/postgresql/data/guacamole      POSTGRES_DB: guacamole_db      POSTGRES_PASSWORD: 'ChooseYourOwnPasswordHere1234'      POSTGRES_USER: guacamole_user    image: postgres:13.4    networks:      guacnetwork_compose:    restart: always    volumes:    - ./init:/docker-entrypoint-initdb.d:ro    - ./data:/var/lib/postgresql/data:rw
  # guacamole  guacamole:    container_name: guacamole_compose    depends_on:    - guacd    - postgres    environment:      GUACD_HOSTNAME: guacd      POSTGRES_DATABASE: guacamole_db      POSTGRES_HOSTNAME: postgres      POSTGRES_PASSWORD: 'ChooseYourOwnPasswordHere1234'      POSTGRES_USER: guacamole_user    image: guacamole/guacamole    links:    - guacd    networks:      guacnetwork_compose:    ports:## enable next line if not using nginx##    - 8080:8080/tcp # Guacamole is on :8080/guacamole, not /.## enable next line when using nginx    - 8080/tcp    restart: always
########### optional ##############  # nginx  nginx:   container_name: nginx_guacamole_compose   restart: always   image: nginx   volumes:   - ./nginx/ssl/self.cert:/etc/nginx/ssl/self.cert:ro   - ./nginx/ssl/self-ssl.key:/etc/nginx/ssl/self-ssl.key:ro   - ./nginx/nginx.conf:/etc/nginx/nginx.conf:ro   - ./nginx/mysite.template:/etc/nginx/conf.d/default.conf:ro   ports:   - 8443:443   links:   - guacamole   networks:     guacnetwork_compose:   # run nginx   command: /bin/bash -c "nginx -g 'daemon off;'"# nginx-debug-mode#   command: /bin/bash -c "nginx-debug -g 'daemon off;'"####################################################################################
Tổng cộng sẽ có 4 dịch vụ được kích hoạt, mỗi em đảm nhận 1 nhiệm vụ:
- guacd: Guacamole Server
- guacamole: Guacamole Client
- postgres: PostgresSQL Database
- Nginx: Reverse Proxy (không bắt buộc)
Mình đã có sẵn Nginx Proxy Manager làm Reverse Proxy, không cần thêm cái Nginx trong file này nữa nên sẽ xoá toàn bộ thông số của phần nginx ở cuối. Bên cạnh đó, cần phải sửa lại dòng 139 (bỏ #) và dòng 141 (thêm #)
Đồng thời xoá luôn phần thông tin ở phần đầu cho gọn.
File docker-compose.yml được rút lại như dưới đây
version: "2.0"
# networks# create a network 'guacnetwork_compose' in mode 'bridged'networks:  guacnetwork_compose:    driver: bridge
# servicesservices:  # guacd  guacd:    container_name: guacd_compose    image: guacamole/guacd    networks:      guacnetwork_compose:    restart: always    volumes:      - ./drive:/drive:rw      - ./record:/record:rw  # postgres  postgres:    container_name: postgres_guacamole_compose    environment:      PGDATA: /var/lib/postgresql/data/guacamole      POSTGRES_DB: guacamole_db      POSTGRES_PASSWORD: "ChooseYourOwnPasswordHere1234"      POSTGRES_USER: guacamole_user    image: postgres:13.4    networks:      guacnetwork_compose:    restart: always    volumes:      - ./init:/docker-entrypoint-initdb.d:ro      - ./data:/var/lib/postgresql/data:rw
  # guacamole  guacamole:    container_name: guacamole_compose    depends_on:      - guacd      - postgres    environment:      GUACD_HOSTNAME: guacd      POSTGRES_DATABASE: guacamole_db      POSTGRES_HOSTNAME: postgres      POSTGRES_PASSWORD: "ChooseYourOwnPasswordHere1234"      POSTGRES_USER: guacamole_user    image: guacamole/guacamole    links:      - guacd    networks:      guacnetwork_compose:    ports:      ## enable next line if not using nginx      - 8080:8080/tcp # Guacamole is on :8080/guacamole, not /.    ## enable next line when using nginx    ##    - 8080/tcp    restart: always
4. Kích hoạt Guacamole
docker-compose up -dMở trình duyệt web truy cập vào địa chỉ sau (chú ý phải có /guacamole ở cuối).
http://<IP-của-Server>:8080/guacamoleNếu suôn sẻ, bạn sẽ nhìn thấy trang đăng nhập của Guacamole như dưới đây
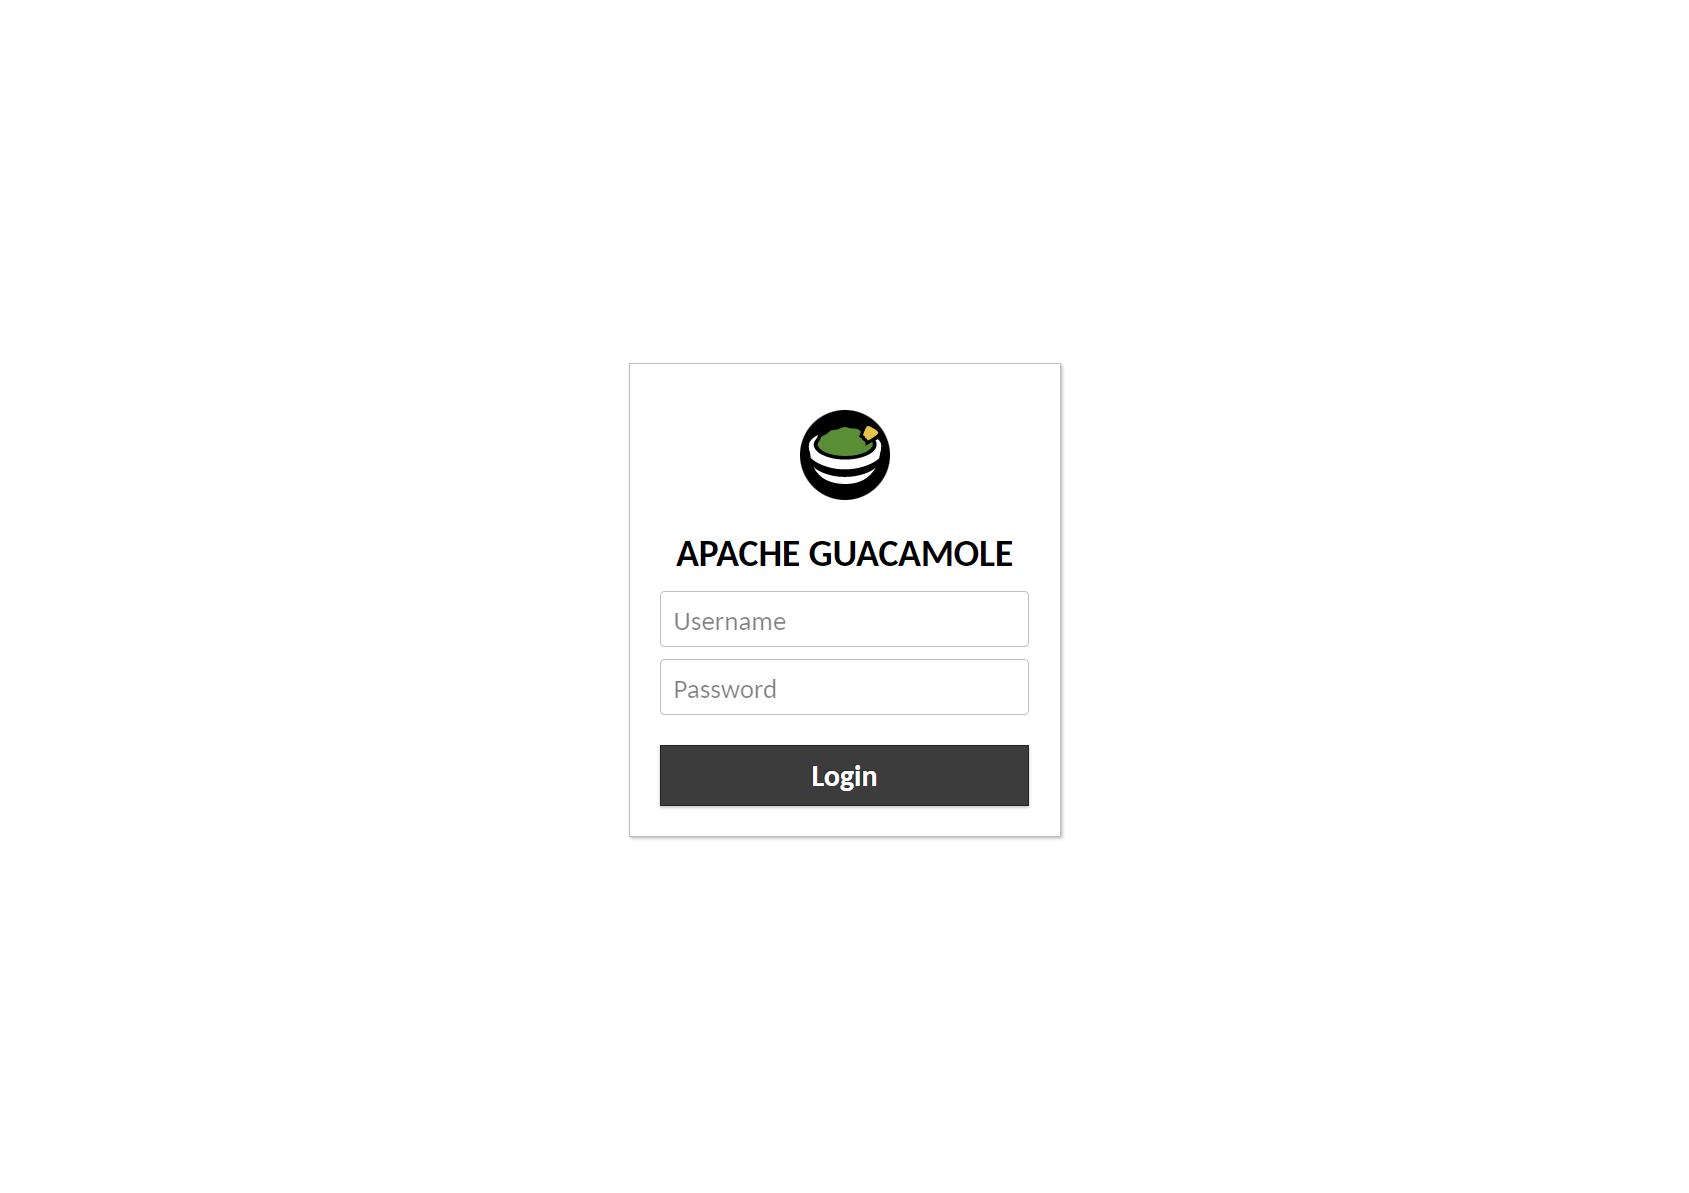
Đăng nhập bằng tài khoản mặc định
- Username: guacadmin
- Password: guacadmin
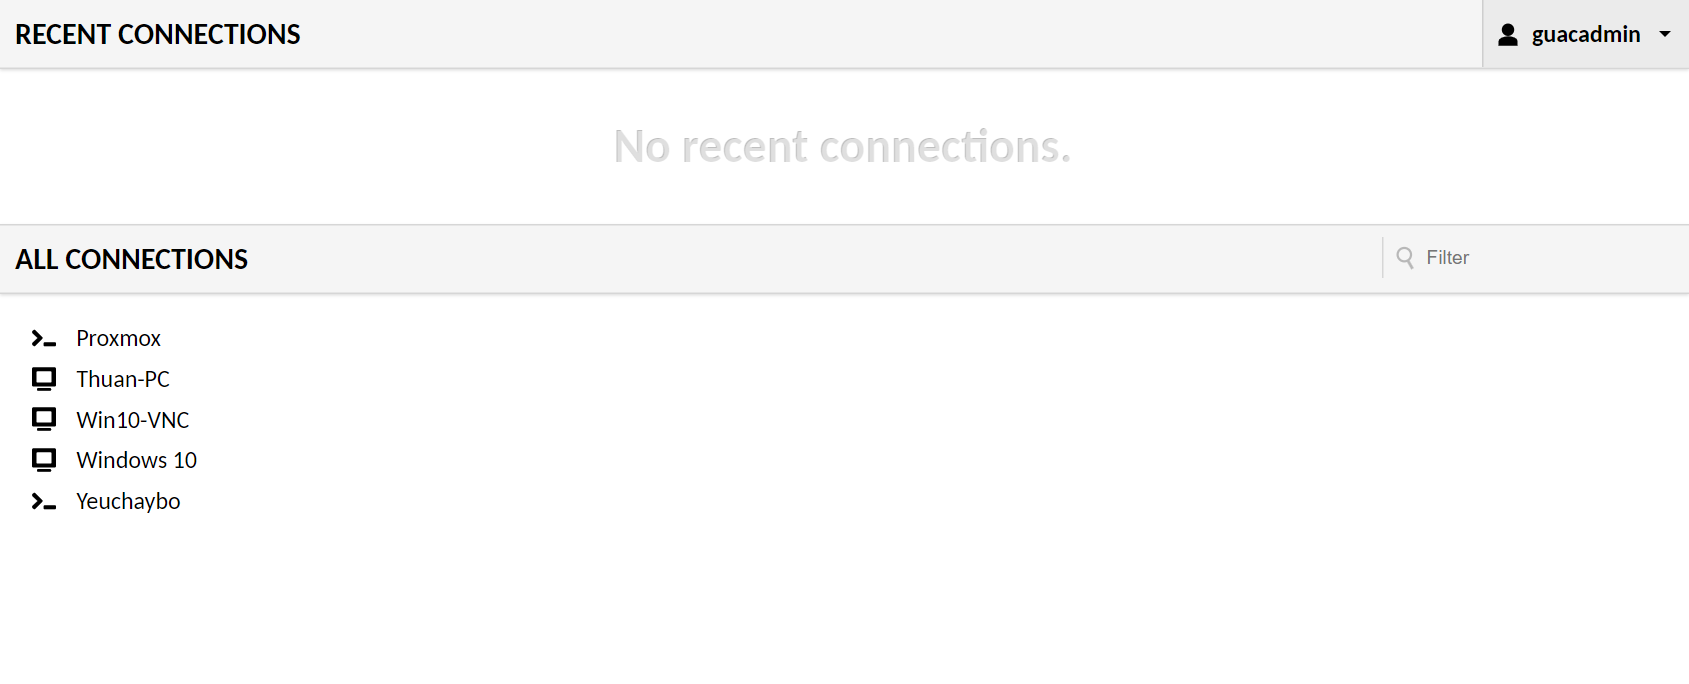
Giao diện mặc định của Guacamole hiện ra nào
III. Cấu hình Guacamole
1. Thay đổi mật khẩu
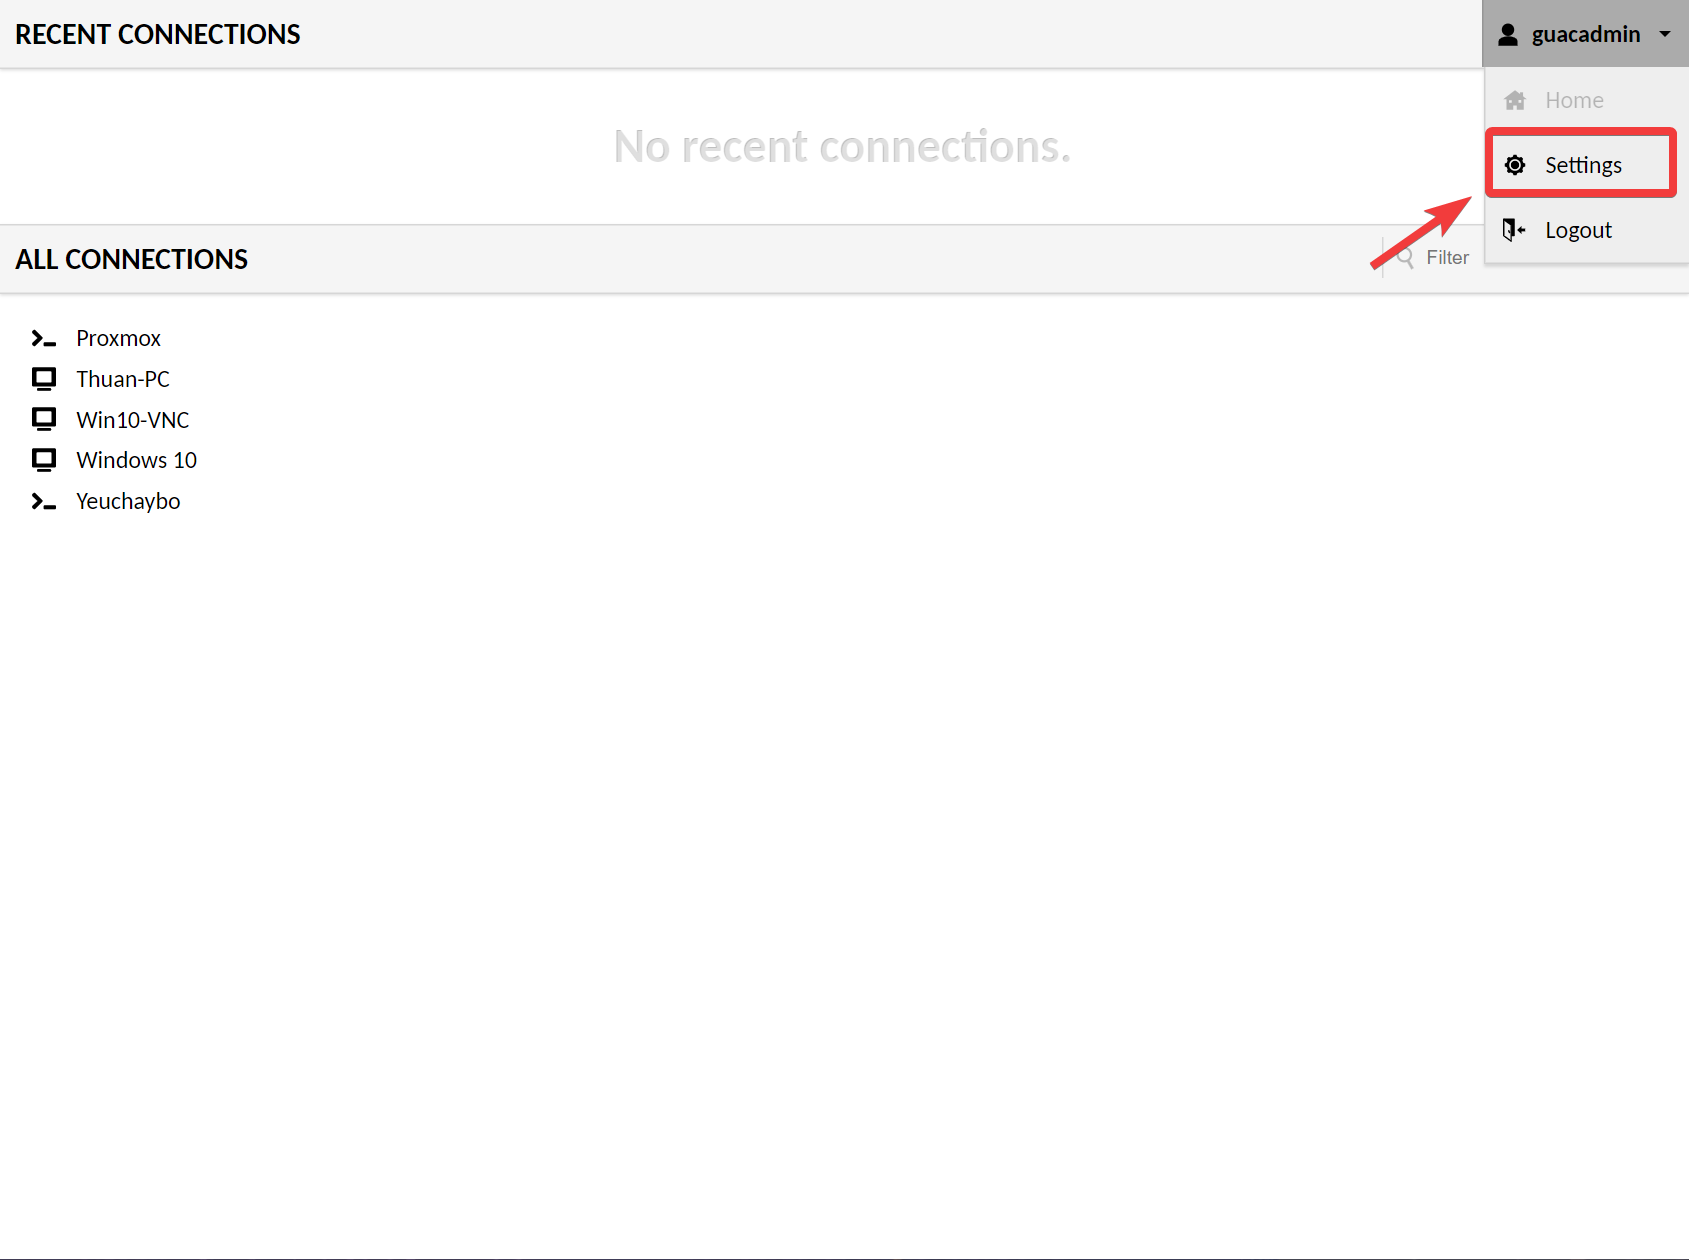
Để tăng bảo mật, việc đầu tiên bạn cần làm là thay đổi mật khẩu của tài khoản mặc định guacadmin.
Bấm vào tên tài khoản ở góc trên bên phải, chọn Settings
Sau đó chuyển qua tab Preferences và cập nhật mật khẩu mới cho tài khoản mặc định guacadmin trong phần Change Password. Bấm Update Password để xác nhận thay đổi.
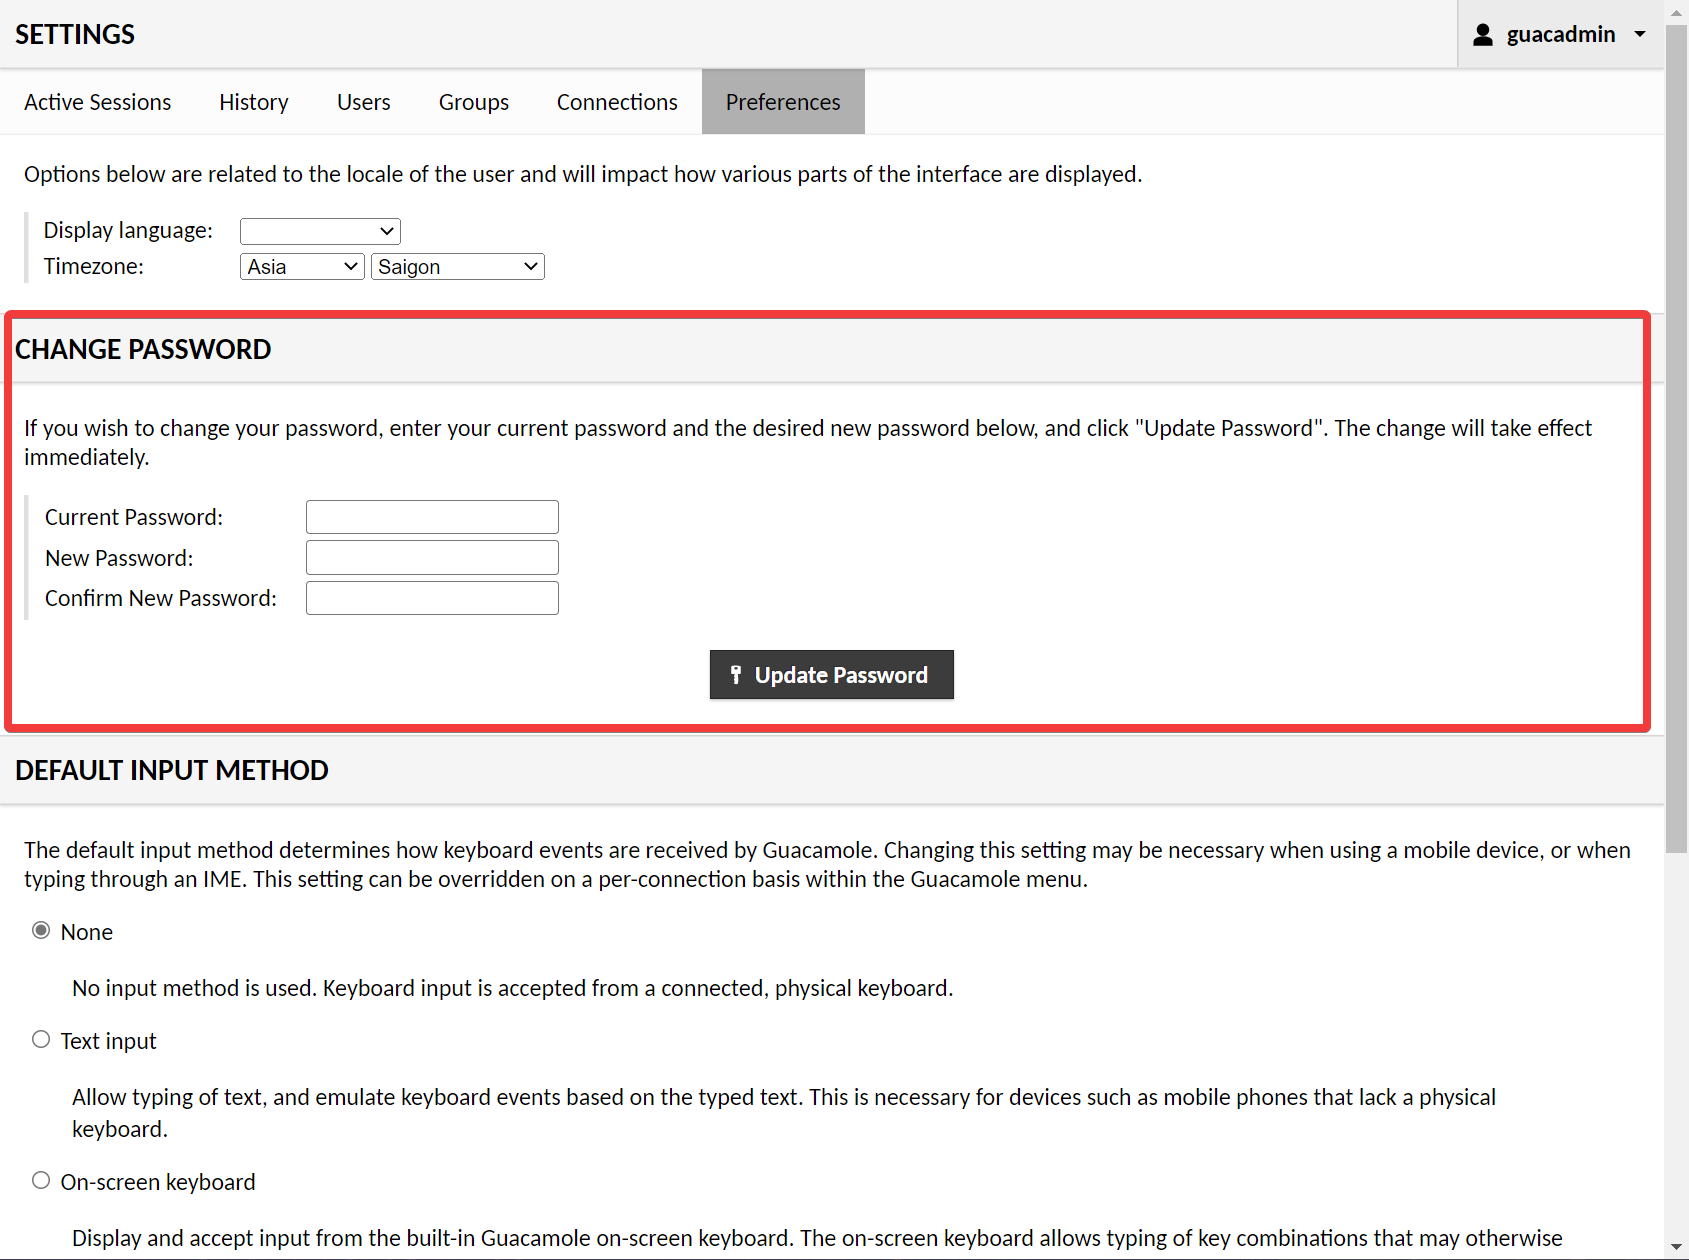
Ngoài ra bạn cũng có thể truy cập vào tab Users để tạo tài khoản mới, sau đó xoá tài khoản mặc định guacadmin khỏi hệ thống.
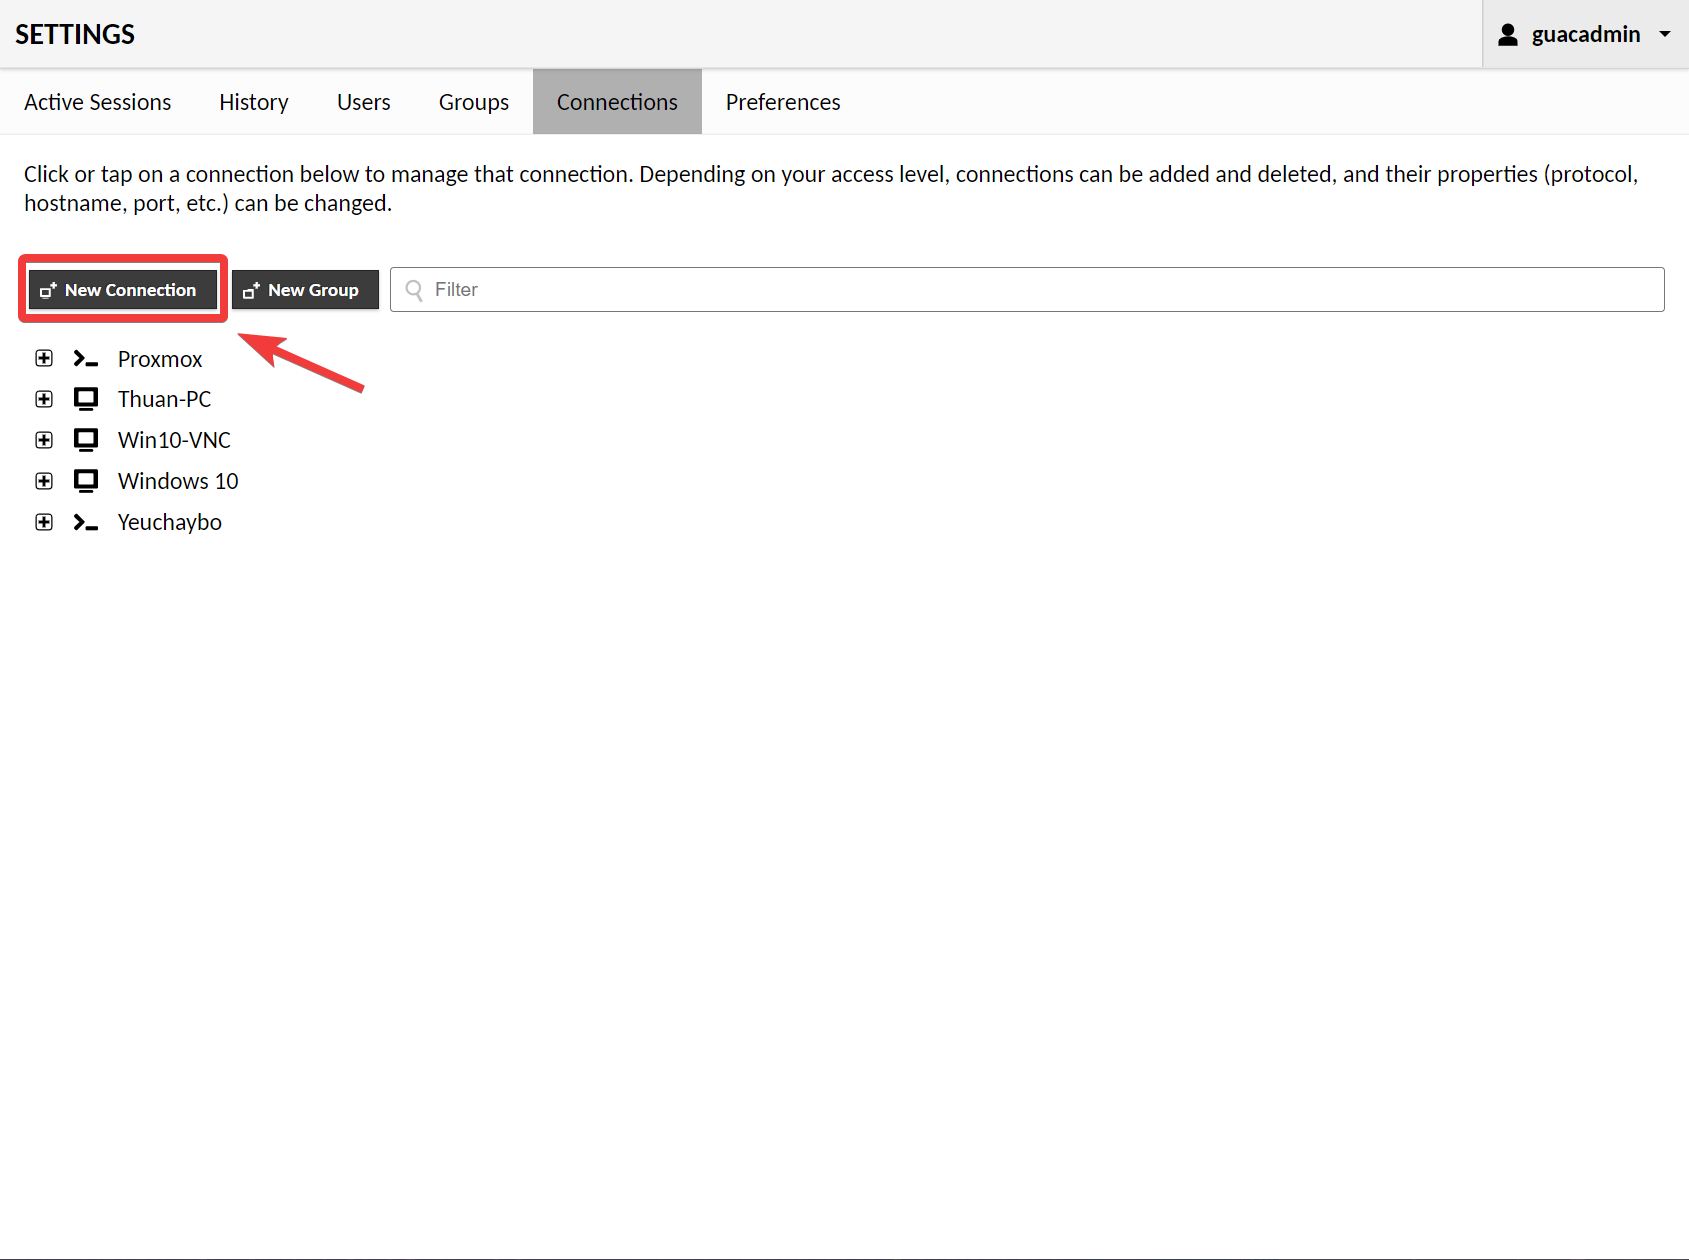
2. Tạo kết nối RDP
Tiếp theo, truy cập vào tab Connections để bắt đầu thiết lập các kết nối đến máy tính cần truy cập. Bấm nút New Connection để tạo kết nối mới.
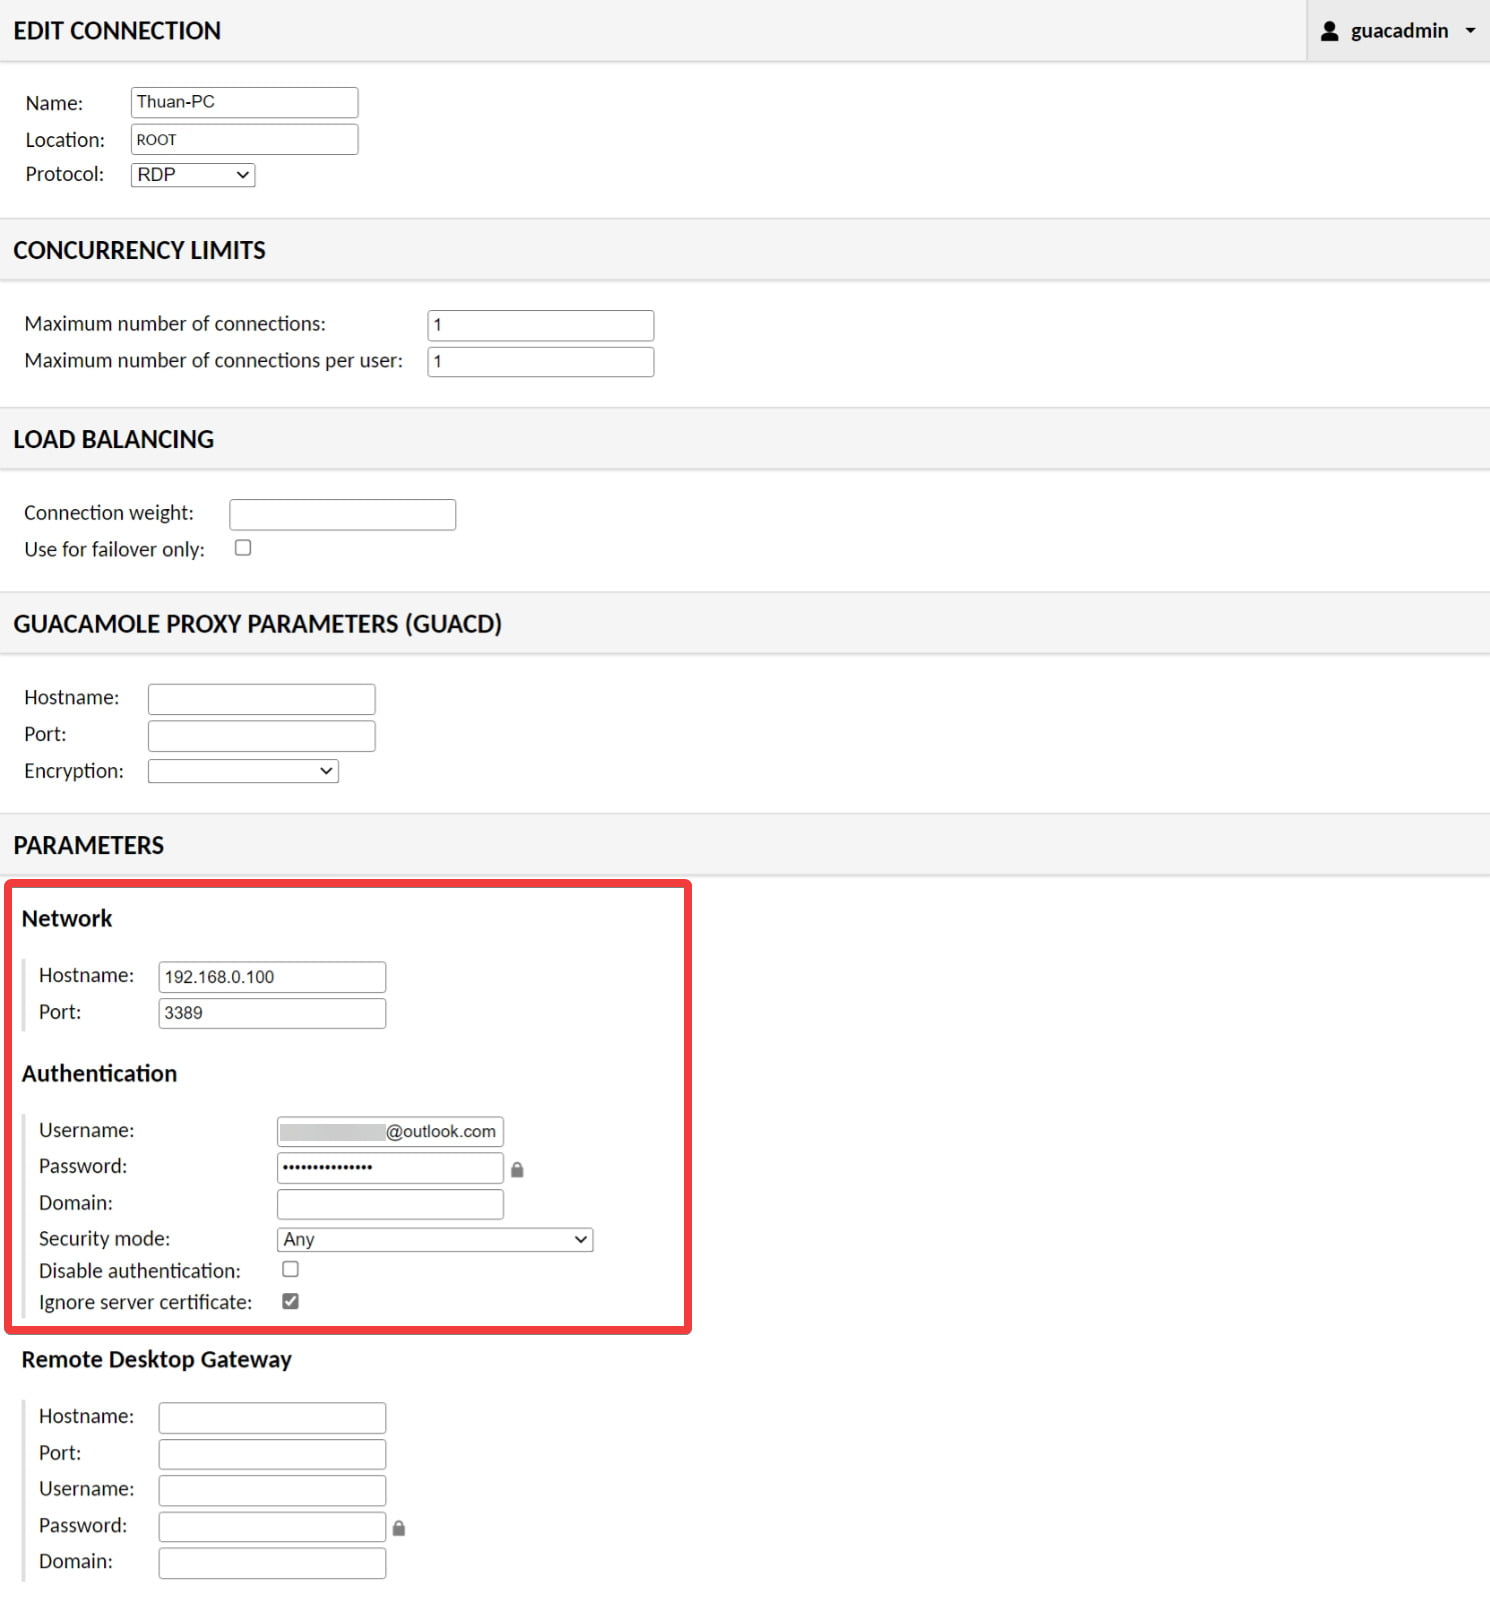
Đầu tiên, mình sẽ tạo kết nối Remote Desktop đến máy tính chạy Windows thông qua giao thức RDP.
- Name: Đặt tên kết nối theo ý của bạn
- Protocol: chọn RDP
Kéo xuống mục Parameters và nhập tiếp các thông tin sau
- Hostname: địa chỉ IP hoặc tên hostname của máy tính cần điều khiển
- Port: 3389 (đây là port mặc định của RDP. Nếu bạn đã thay đổi cổng kết nối RDP của máy tính, cần phải nhập đúng port đó ở đây)
- Username / Password: nhập tên tài khoản và mật khẩu đăng nhập máy tính
- Domain: để trống nếu bạn đăng nhập máy tính bằng tài khoản email Microsoft hoặc điền vào WORKGROUP nếu bạn đăng nhập bằng tài khoản offline.
- Security Mode: chọn Any
- Ignore server certificate: bấm chọn để ẩn cảnh báo SSL, đỡ vướng mắt.
Sau đó bấm xuống dưới cùng bấm Save để lưu lại.
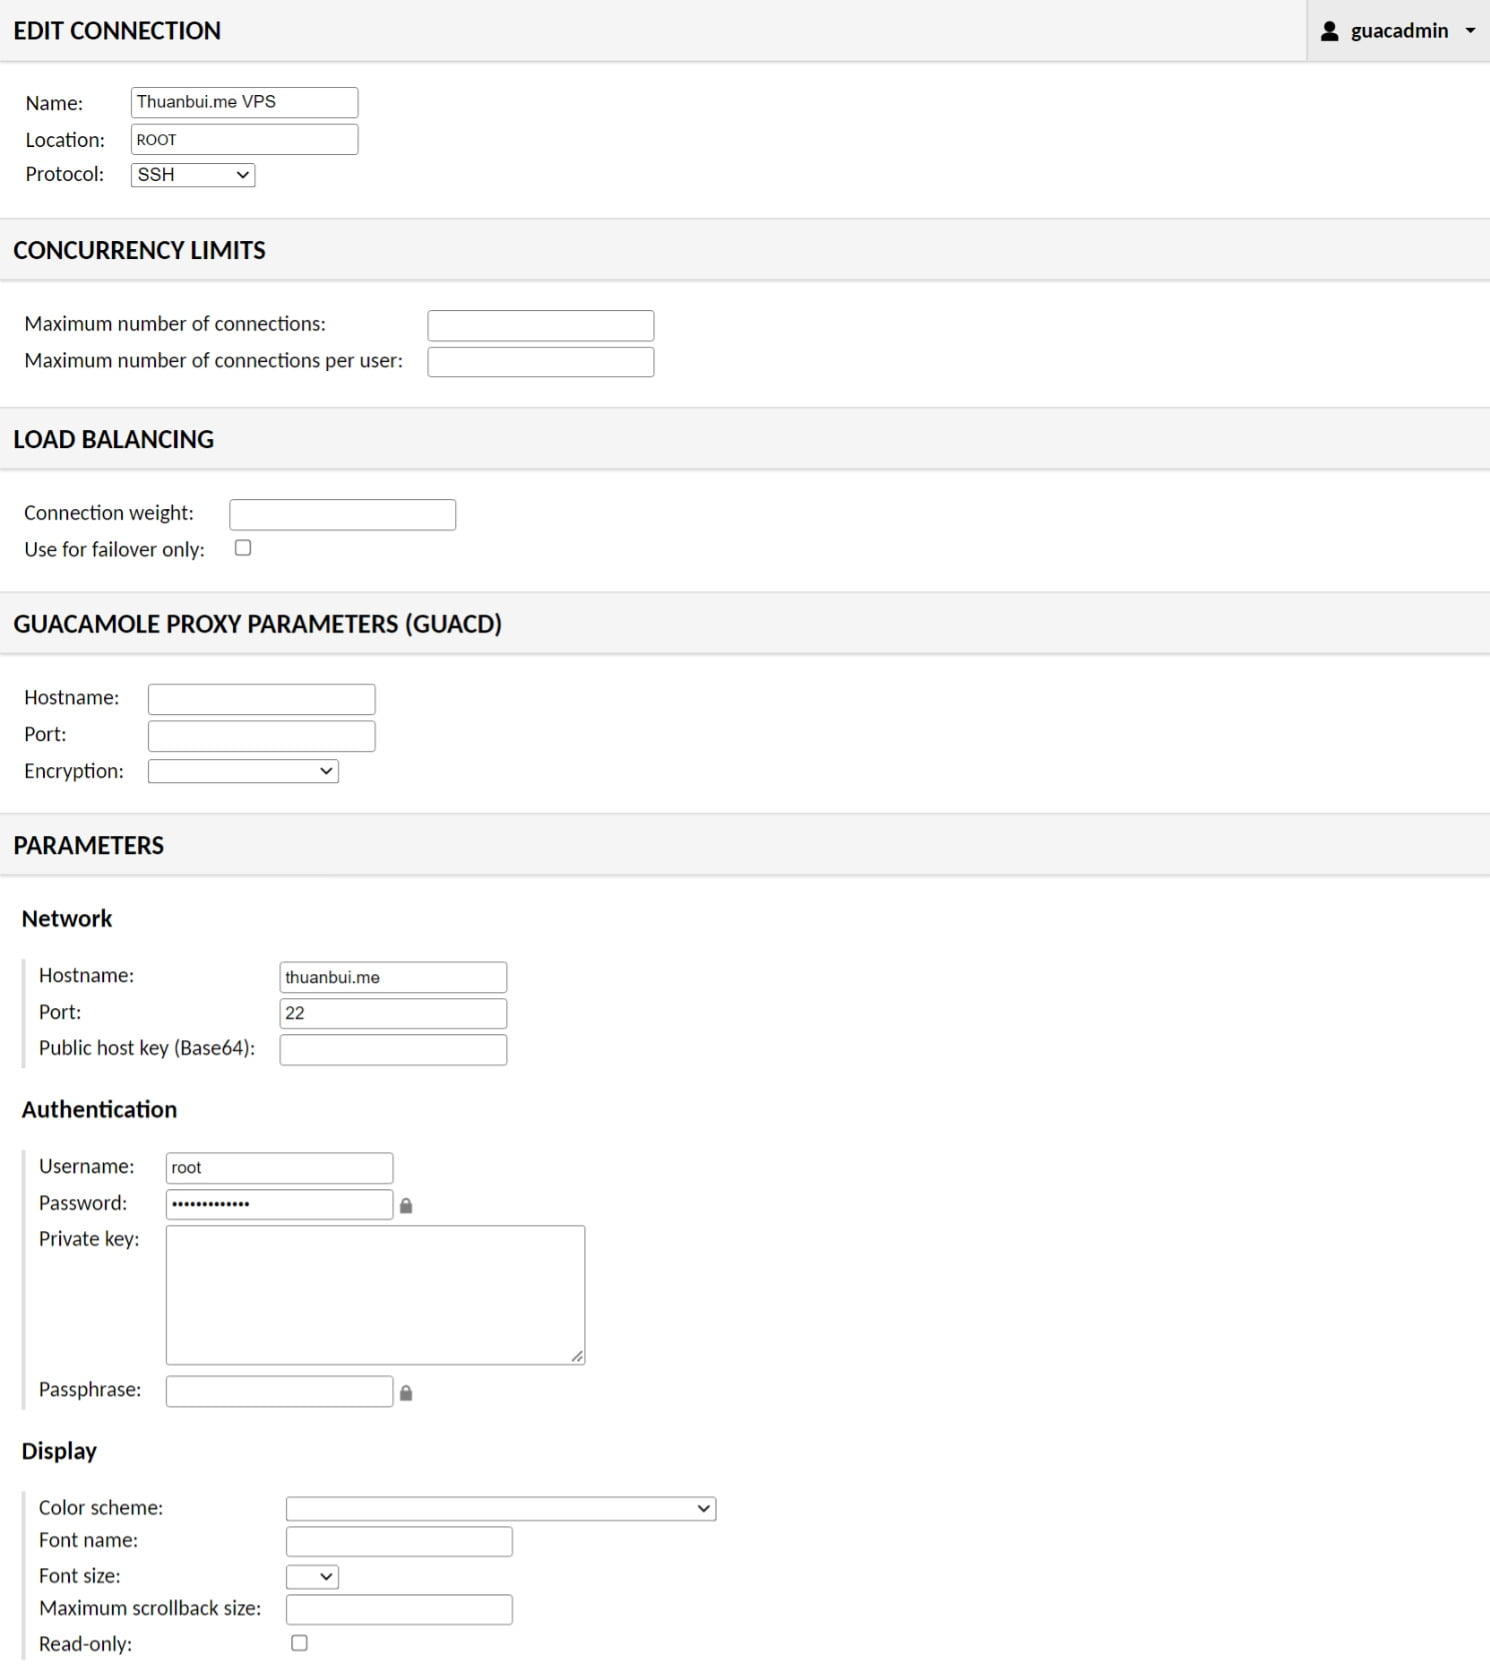
3. Tạo kết nối SSH
Tương tự như trên, nhưng mục Protocol sẽ chọn SSH và thông số Parameters sẽ hơi khác
- Hostname: địa chỉ IP hay tên miền của máy chủ
- Port: 22
- Username / Password: tài khoản và mật khẩu đăng nhập máy chủ
- Private key: nếu bạn đã thiết lập kết nối SSH thông qua Private Key, điền nó vào mục này.
Bấm Save để lưu lại.
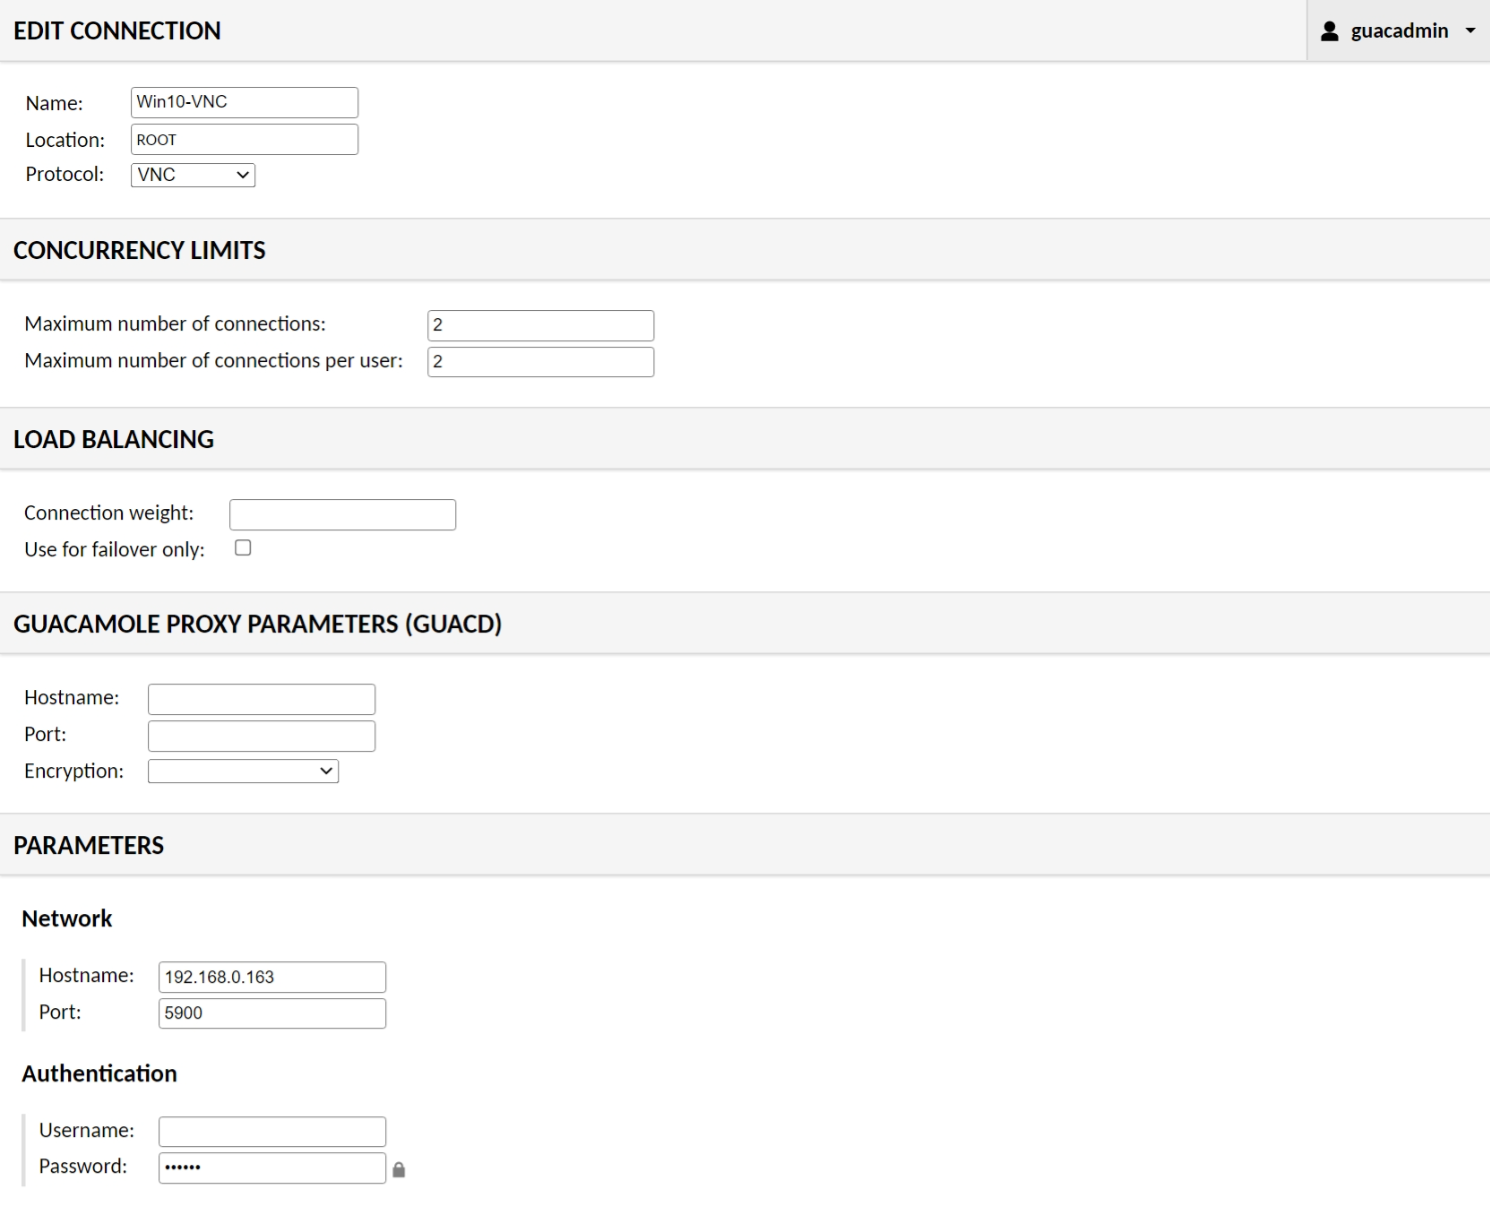
4. Tạo kết nối VNC
Thao tác y hệt như 2 phần trước, chỉ thay đổi vài chỗ
- Protocol: VNC
- Port: 5900
Sau khi thiết lập xong, quay lại trang chủ, bạn sẽ thấy danh sách tất cả các kết nối hiện ra như dưới đây
IV. Sử dụng Guacamole
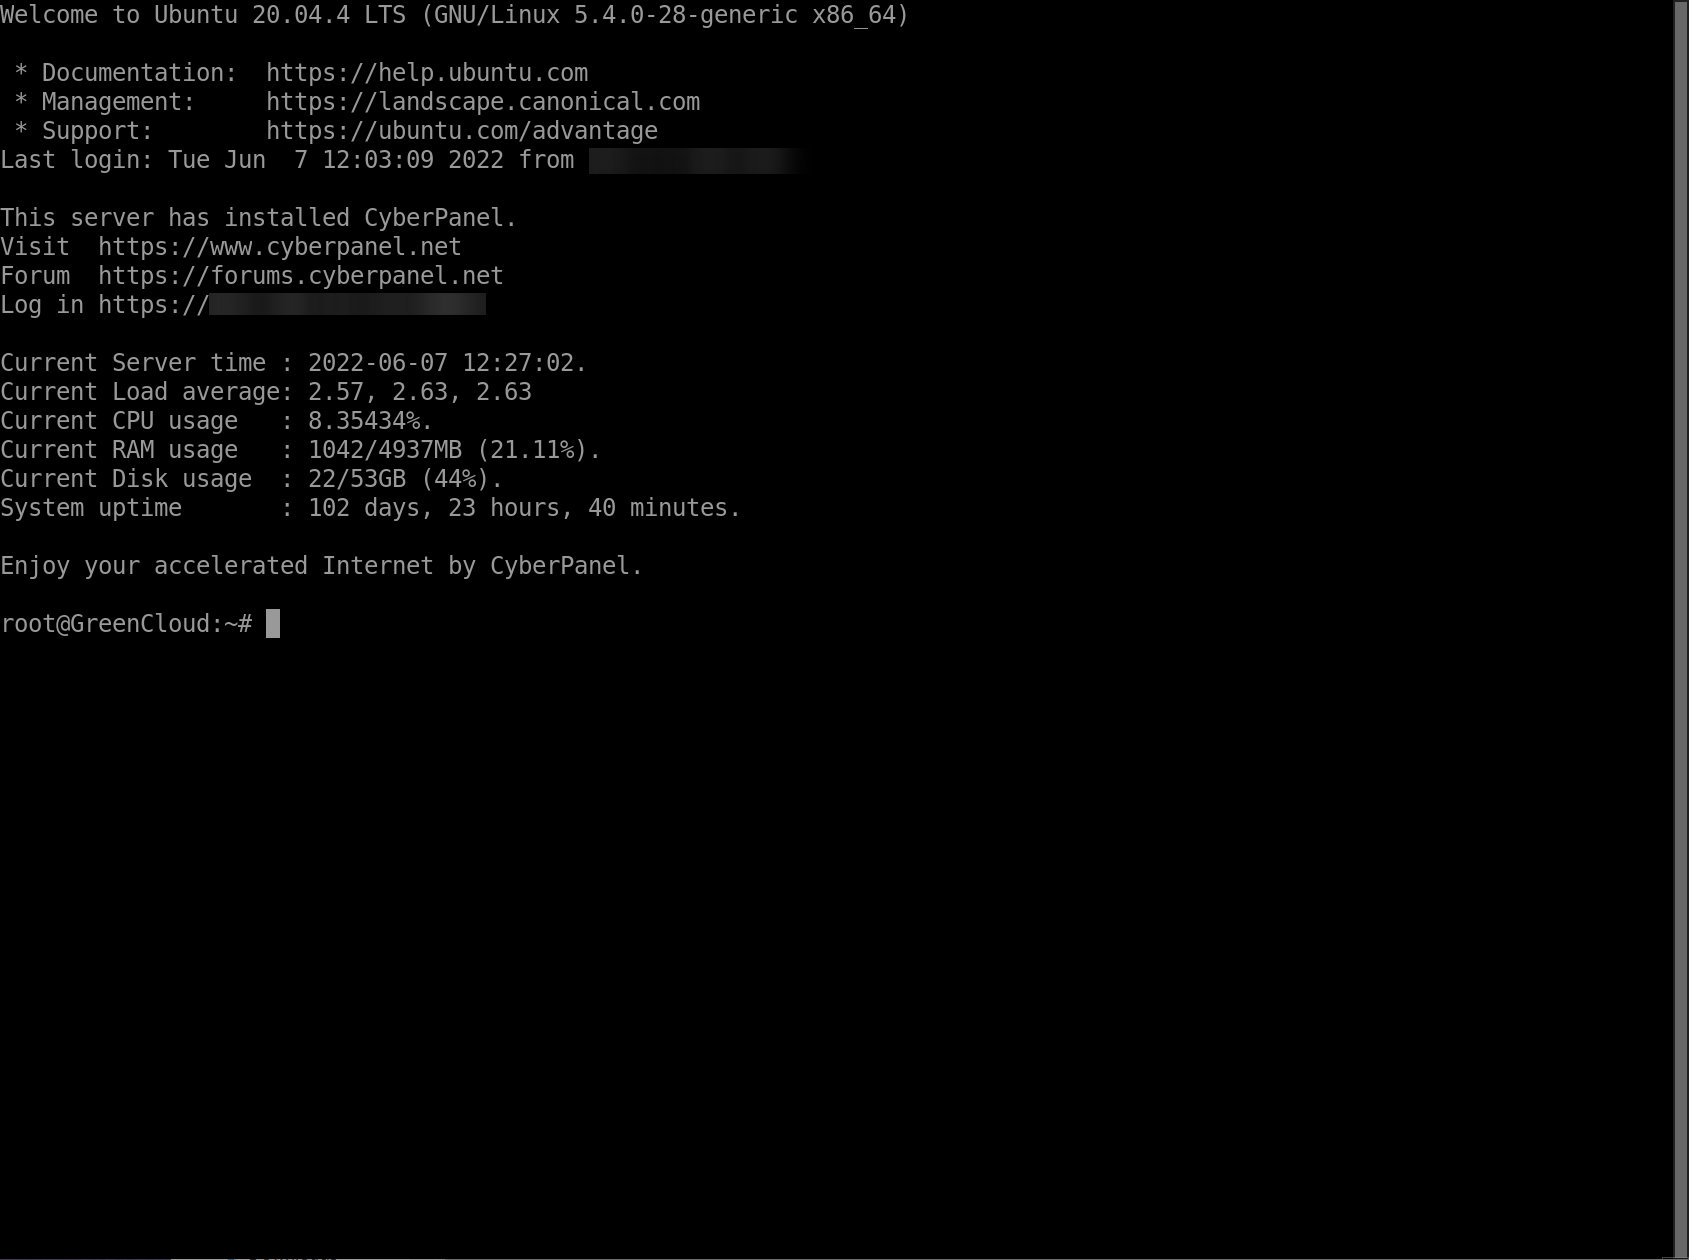
Để truy cập vào máy chủ, bấm vào kết nối tương ứng. Ví dụ như mình truy cập vào VPS thông qua SSH, Guacamole sẽ tự động kết nối và đăng nhập vào VPS dựa theo thông tin đã cấu hình trước đó
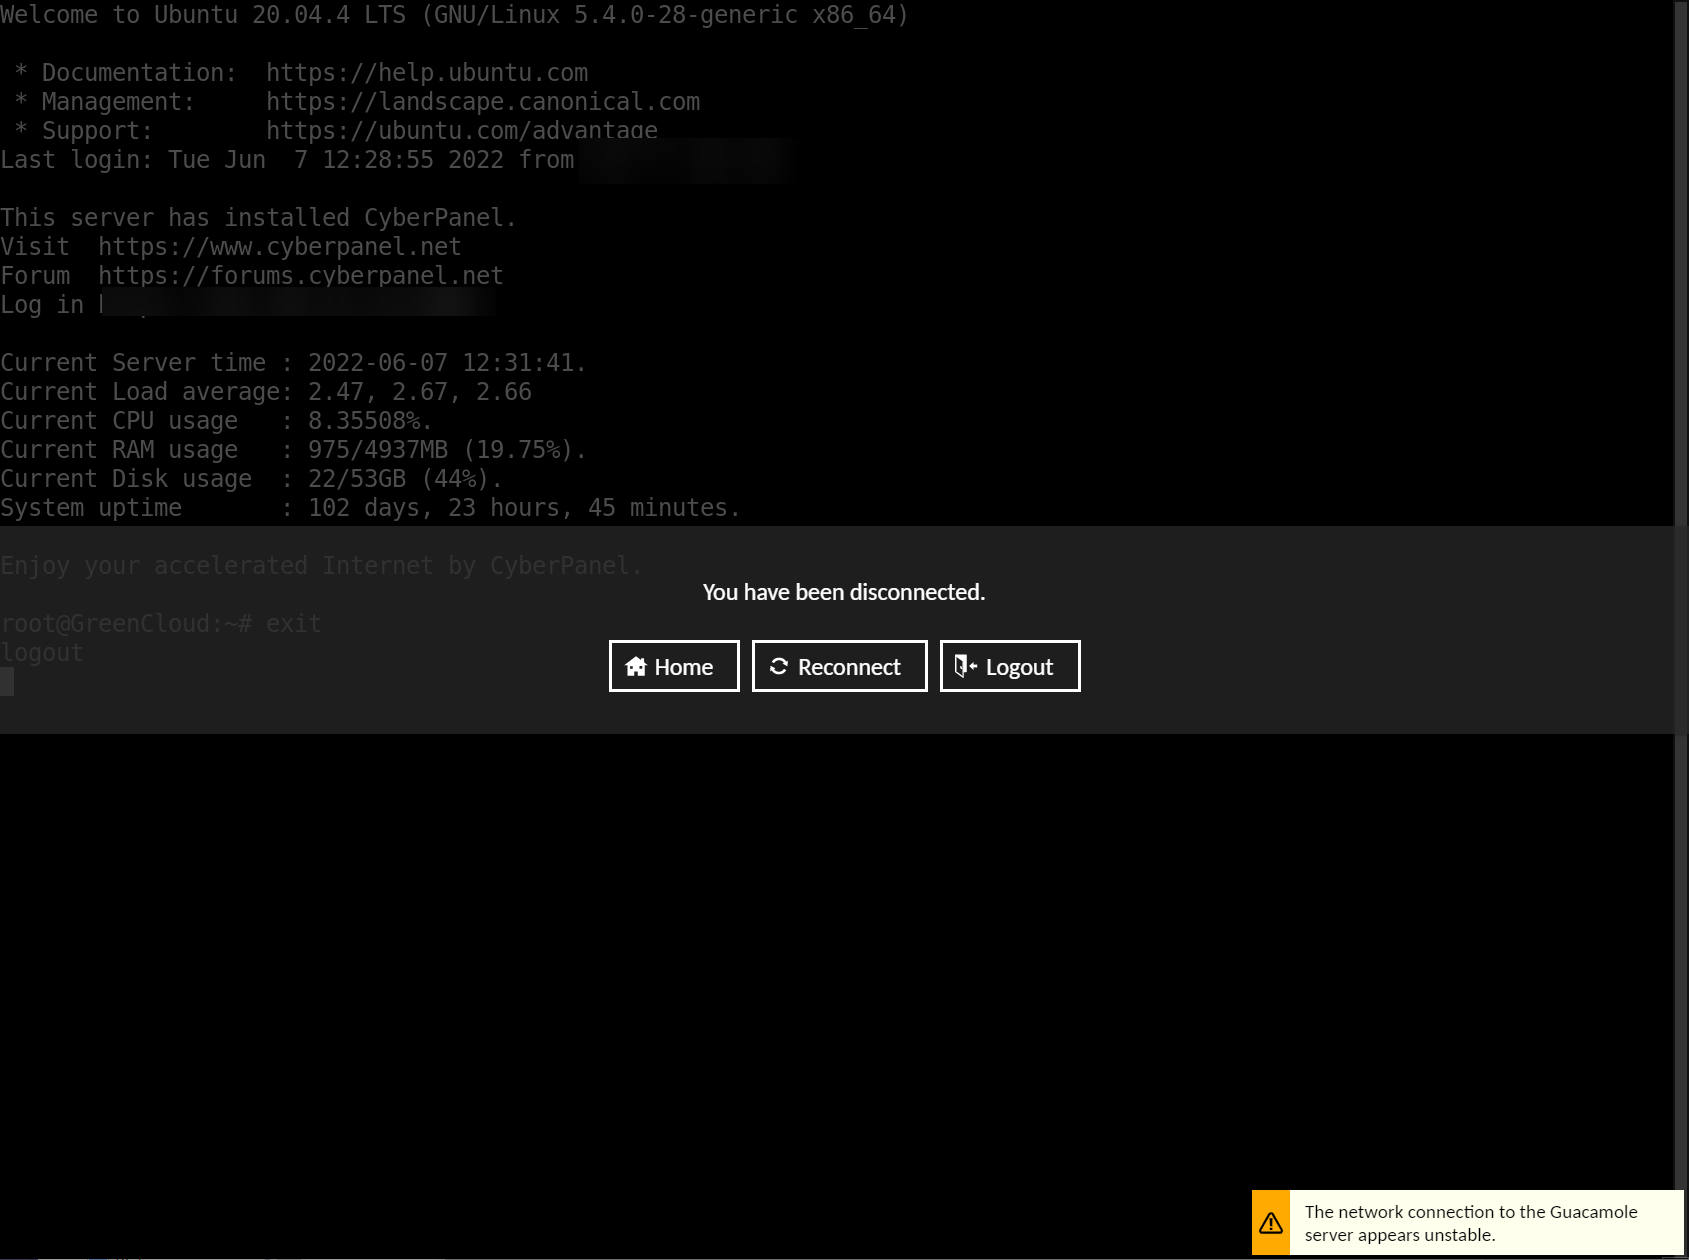
Để thoát khỏi máy chủ và quay về trang quản lý của Guacamole, mình gõ lệnh exit, sau đó chọn Home
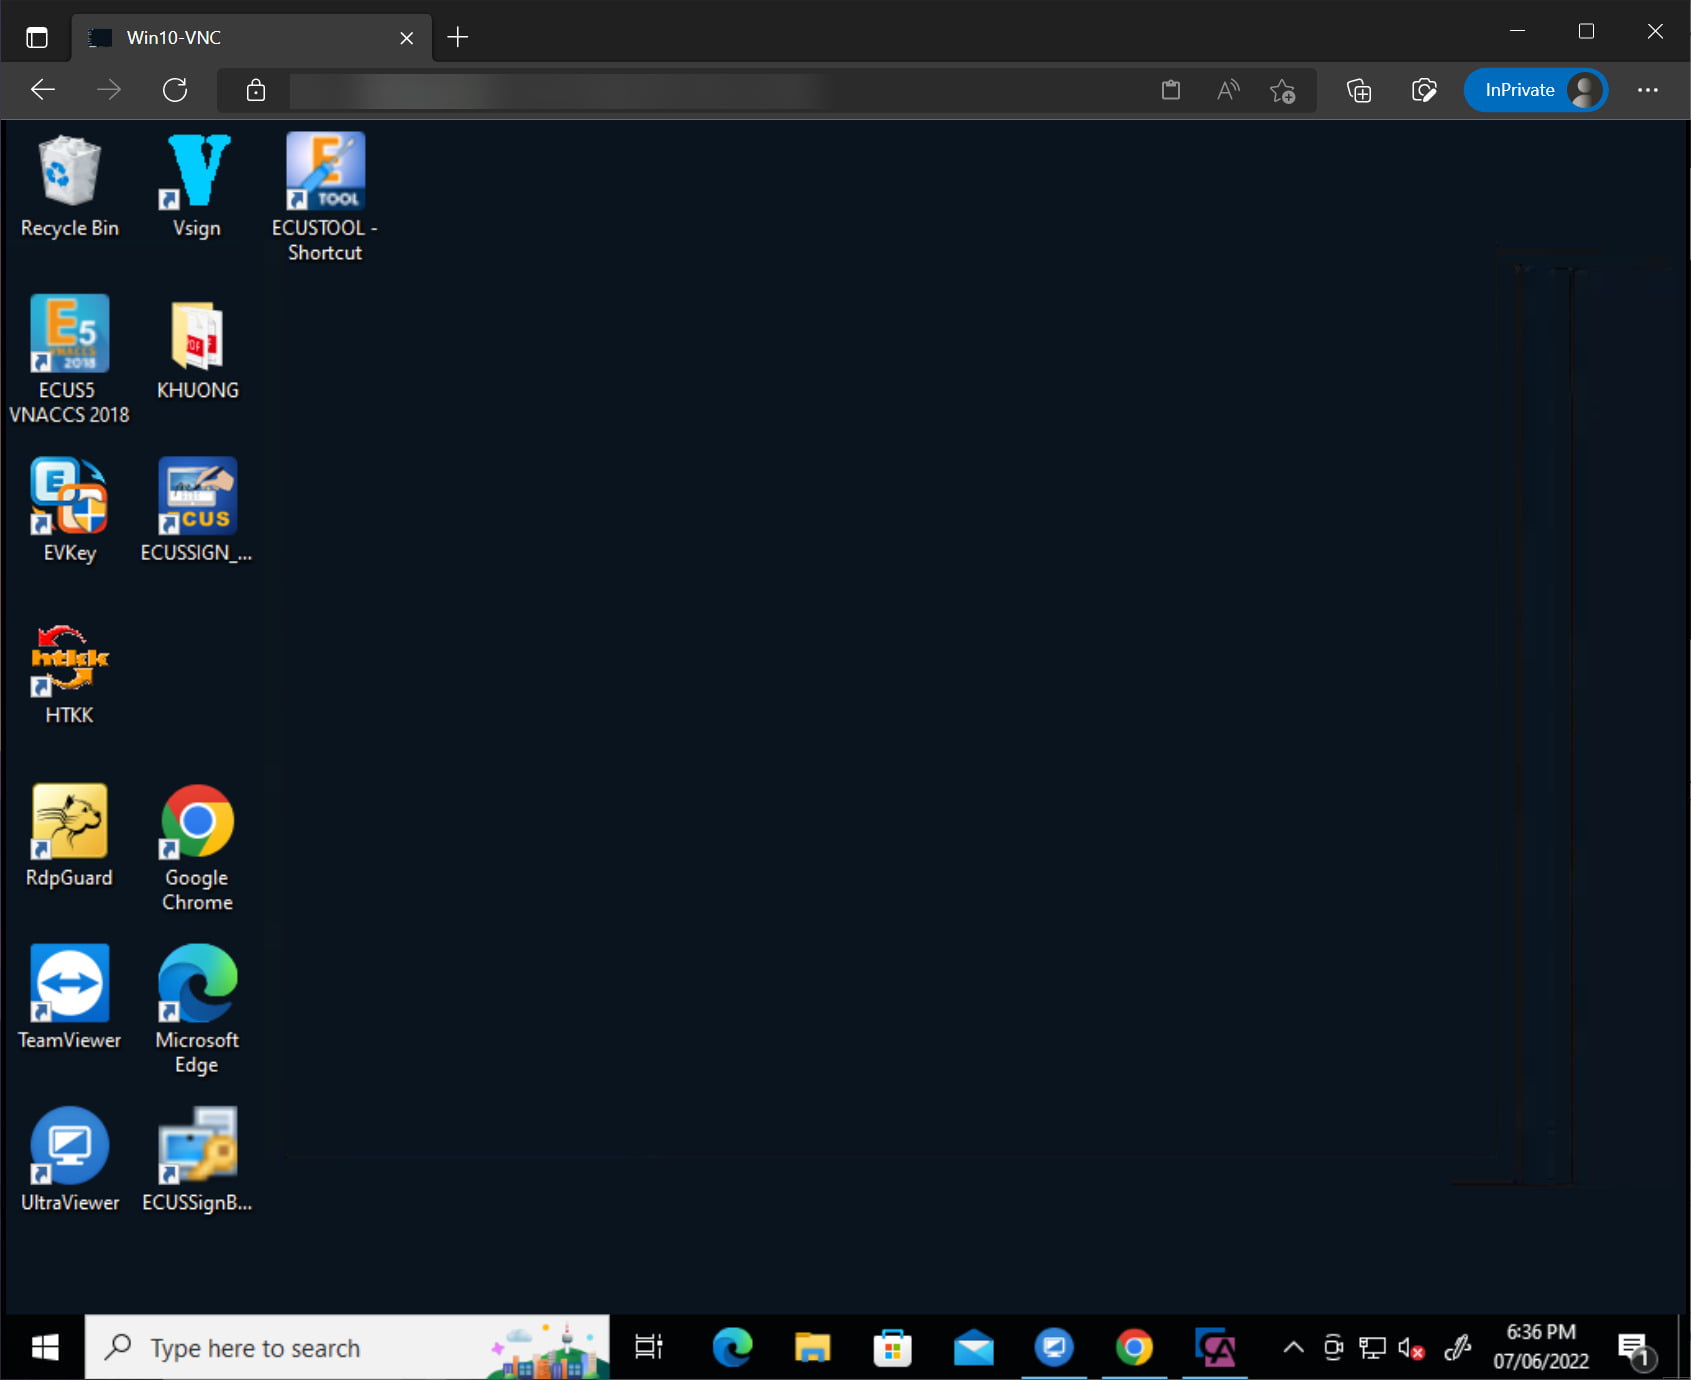
Trong trường hợp kết nối vào máy tính có giao diện desktop, ví dụ Windows 10, bạn sẽ thao tác trực tiếp trên trình duyệt như đang ngồi trước máy tính.
Nếu muốn chỉnh thiết lập của Guacamole khi đang kết nối với máy chủ, hãy bấm tổ hợp phím Ctrl - Alt - Shift để truy cập Menu. Bấm tổ hợp này thêm 1 lần nữa để tắt đi
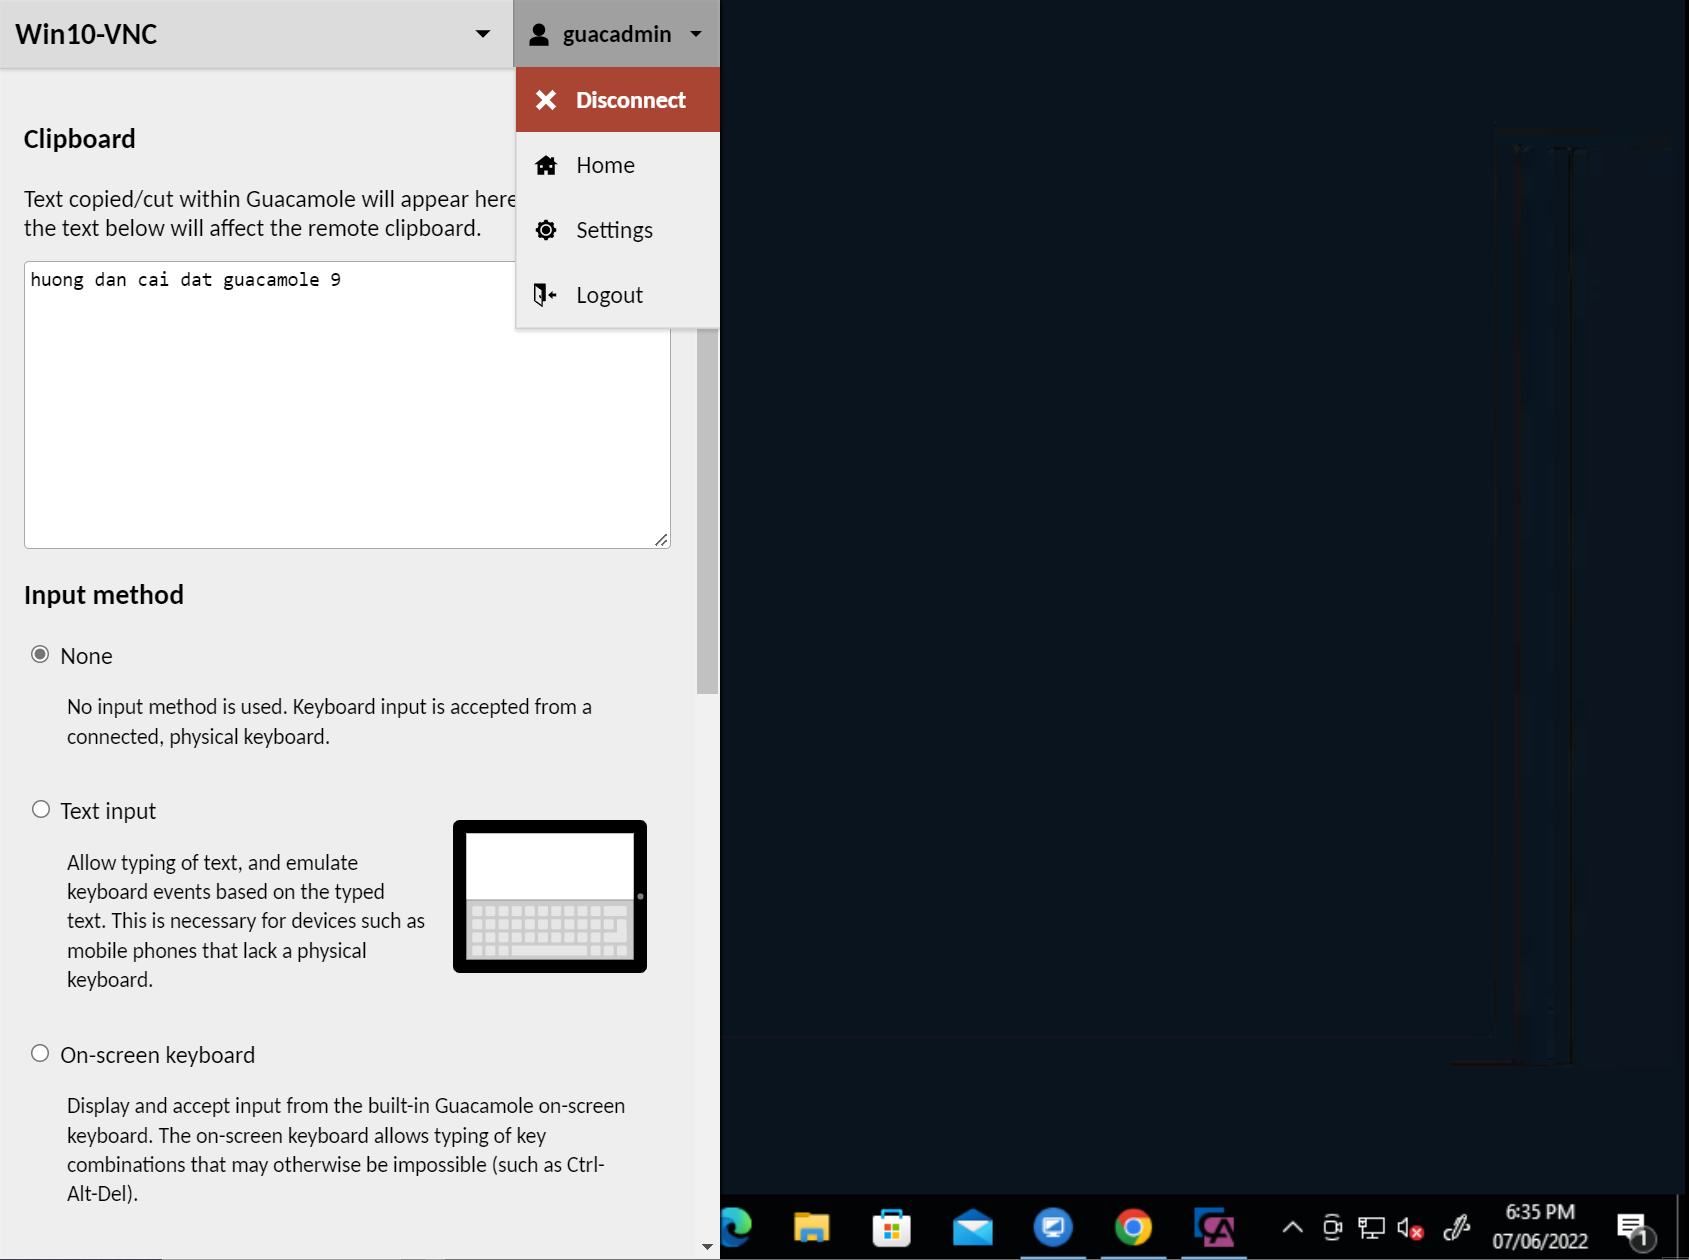
Từ Menu này, bạn có thể thay đổi các thiết lập Input, Mouse, Display, Zoom. Nếu muốn thoát khỏi kết nối hiện tại, bấm vào tên tài khoản, chọn Disconnect.
V. Tạo Reverse Proxy cho Guacamole
Mình muốn truy cập Guacamole thông qua tên miền, kết hợp thêm chứng chỉ SSL nên sẽ sử dụng Nginx Proxy Manager để tạo Reverse Proxy cho nó.
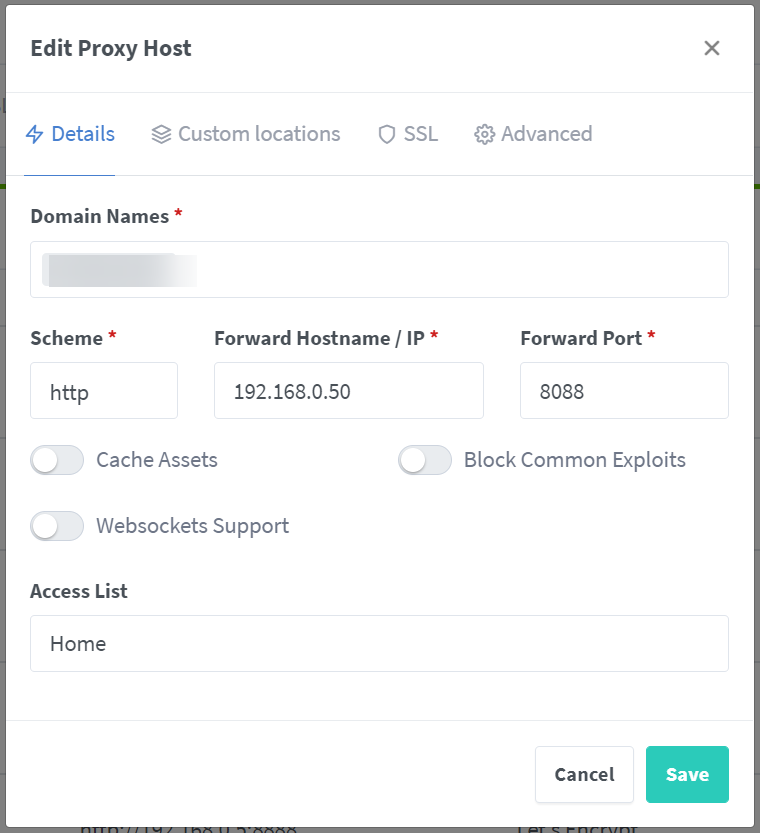
Tạo Proxy Host mới và nhập vào các thông tin cần thiết
- Domain Name: tên miền để truy cập vào Guacamole
- Scheme: http
- Forward Hostname / IP: Địa chỉ IP của máy chủ đang cài Guacamole
- Forward Port: 8088
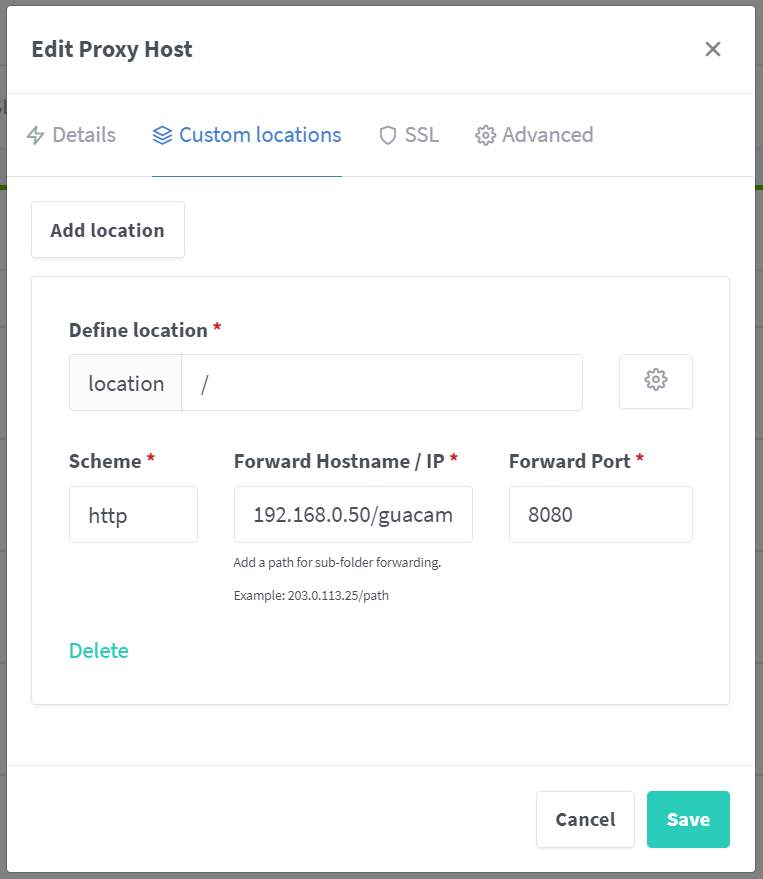
Chọn qua tab Custom locations, tạo location mới
- location:
/ - Scheme: http
- Forward Hostname / IP:
192.168.0.50/guacamole/(chú ý phải ghi đầy đủ/guacamole/sau địa chỉ IP - Forawrd Port: 8088
Bấm tiếp qua mục SSL để yêu cầu tạo chứng chỉ SSL mới
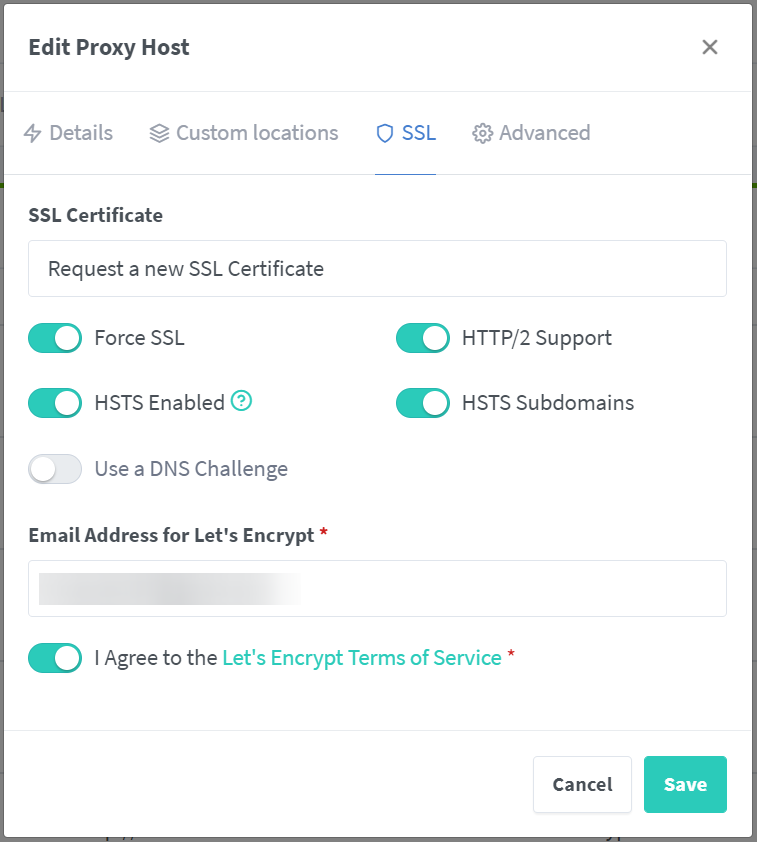
Bấm Save để lưu lại.
Nếu thực hiện chính xác, bạn đã có thể truy cập Guacamole thông qua tên miền đã thiết lập ở trên.
Hướng dẫn cài đặt và sử dụng Apache Guacamole đến đây là hết. Chúc bạn thực hiện thành công!