Chào mừng bạn đến với series hướng dẫn File Upload trong Laravel trên blog thuanbui.me!
Đây là một chuỗi bài viết nhằm tổng kết lại những kiến thức mình vừa học được từ khóa học Laravel File Uploads của Laravel Daily. Mục đích vừa để giúp mình ôn lại kiến thức thêm 1 lần nữa, vừa để dành lưu trữ để sau này có thể quay lại tra cứu khi cần. Hy vọng sẽ hữu ích được cho các bạn mới làm quen với Laravel như mình.
Bài viết đầu tiên này sẽ bao gồm các nội dung chính sau:
Yêu cầu trước khi bắt đầu
Để theo dõi và thực hành theo series này, bạn cần có:
- Kiến thức cơ bản về Laravel: Biết cách tạo project mới, chạy migration, route, controller, v.v.
- Môi trường phát triển Laravel đã cài đặt sẵn
Trong series này, mình thiết lập Laravel trên macOS, sử dụng Laravel Herd.
Nếu bạn dùng macOS và chưa cài Herd, có thể xem hướng dẫn tại đây:
Nếu bạn sử dụng Windows, tham khảo hướng dẫn cài đặt Laravel với Docker + WSL 2 + Laravel Sail
I. Tạo form upload file
Trước tiên tạo dự án Laravel 12 mới để sử dụng cho việc học File Upload trong Laravel
laravel new uploadMở file web.php, tạo Route mới cho việc upload file
Route::get('/upload', [UploadController::class, 'index'])->name('upload.index');Route::post('/upload', [UploadController::class, 'store'])->name('upload.store');Tạo giao diện form upload resources/views/upload.blade.php
<!DOCTYPE html><html lang="en"><head> <meta charset="UTF-8"> <meta name="viewport" content="width=device-width, initial-scale=1.0"> <title>Upload File</title> <script src="https://cdn.tailwindcss.com"></script></head><body class="bg-gray-100 font-sans antialiased"> <div class="container mx-auto mt-10 p-6 bg-white rounded-lg shadow-md max-w-md"> <h1 class="text-2xl font-bold mb-6 text-center text-gray-700">Upload File</h1> <form action="{{ route("upload.store") }}" method="POST" enctype="multipart/form-data" class="space-y-4"> @csrf <div> <label for="file" class="block text-sm font-medium text-gray-700 mb-1">Choose file</label> <input type="file" name="file" id="file" class="block w-full text-sm text-gray-500 file:mr-4 file:py-2 file:px-4 file:rounded-full file:border-0 file:text-sm file:font-semibold file:bg-blue-50 file:text-blue-700 hover:file:bg-blue-100"/> </div> <button type="submit" class="w-full bg-blue-500 hover:bg-blue-700 text-white font-bold py-2 px-4 rounded focus:outline-none focus:shadow-outline"> Upload </button> </form> </div></body></html>Chú ý: Bắt buộc phải thêm enctype="multipart/form-data" vào phần thông số của <form>, nếu thiếu thì sẽ không upload được file.
II. Xử lý file upload
Tạo UploadController
php artisan make:controller UploadControllerTạo function index() và store() trong file UploadController.php
<?php
namespace App\Http\Controllers;
use Illuminate\Http\Request;
class UploadController extends Controller{    /**     * Hiển thị trang upload file.     *     * @return \Illuminate\View\View     */    public function index()    {        return view('upload');    }
    /**     * Xử lý việc upload file.     *     * @param  \Illuminate\Http\Request  $request     * @return \Illuminate\Http\RedirectResponse     */    public function store(Request $request)    {
        // Tạo biến mới để lưu đường dẫn và tên file gốc        $storedFilePath = null;        $originalFilename = null;
        // Kiểm tra xem request có chứa file với tên là 'file' không        if ($request->hasFile('file')) {            // Lấy đối tượng file từ request            $file = $request->file('file');
            // Lấy tên file gốc từ client            $originalFilename = $file->getClientOriginalName();
            // Lưu file vào thư mục 'uploads' trên disk 'public' (thường là storage/app/public/uploads)            // Laravel sẽ tự động tạo tên file ngẫu nhiên khi lưu            // Phương thức store() trả về đường dẫn tương đối của file đã lưu (ví dụ: 'uploads/ten_file_duy_nhat.jpg')            $storedFilePath = $file->store('uploads', 'public');
            return "File uploaded to: " . $storedFilePath;        }
        return "No file uploaded.";    }}
III. Lưu file vào local disk public
1. Sử dụng hàm store
Dòng 43: $file->store('uploads', 'public') sẽ lưu file vào thư mục uploads nằm trong disk public. Disk public này được khai báo trong file cấu hình config/filesystems.php
'public' => [ 'driver' => 'local', 'root' => storage_path('app/public'), 'url' => env('APP_URL').'/storage', 'visibility' => 'public', 'throw' => false, 'report' => false, ],File sau khi upload sẽ được lưu trong thư mục storage/app/public/uploads, tên file sẽ được Laravel thay đổi thành tên ngẫu nhiên sau khi upload.
Thử nghiệm thử: truy cập http://upload.test, và upload file, Laravel sẽ lưu vào thư mục uploads và đổi tên file thành tên ngẫu nhiên.
File uploaded to: uploads/xxxxxxxxxxxx.png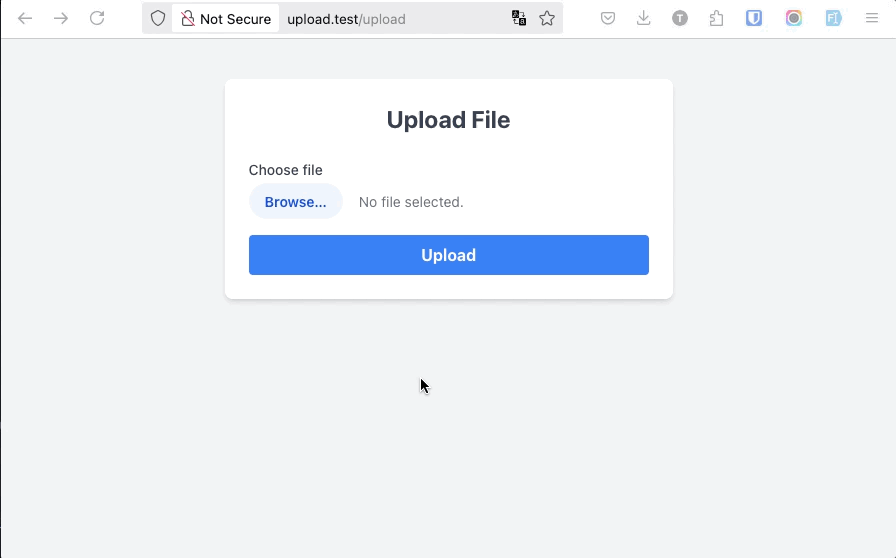
2. Sử dụng hàm storeAs
Trong trường hợp muốn giữ lại tên file gốc khi upload, mình sẽ chuyển qua sử dụng hàm storeAs thay vì store. Đổi dòng 43 thành
// Lưu file vào thư mục 'uploads' trên disk 'public' (thường là storage/app/public/uploads) // sử dụng tên file gốc ($originalFilename). // Lưu ý: Nếu file cùng tên đã tồn tại, nó sẽ bị ghi đè. // Phương thức storeAs() trả về đường dẫn tương đối của file đã lưu (ví dụ: 'uploads/ten_file_goc.jpg') $storedFilePath = $file->storeAs('uploads', $originalFilename, 'public');Hàm storeAs sẽ yêu cầu 3 tham số: thư mục upload (uploads), tên file ($originalFilename), và disk (public).
Tuy nhiên với code hiện tại, khi upload file có cùng tên thì file mới sẽ ghi đè lên file cũ. Do đó cần phải cập nhật lại code để tùy biến lại tên file khi upload, tránh tình trạng ghi đè file
3. Tránh ghi đè file cũ khi các file trùng tên nhau
Cập nhật lại hàm store của UploadController, để các file trùng tên sẽ tự động được thêm hậu tố -1 , -2 ở cuối tên file, tránh ghi đè lên file cũ.
 public function store(Request $request)    {        // Tạo biến mới để lưu đường dẫn và tên file gốc        $storedFilePath = null;        $originalFilename = null;
        // Kiểm tra xem request có chứa file với tên là 'file' không        if ($request->hasFile('file')) {            // Lấy đối tượng file từ request            $file = $request->file('file');            // Lấy tên file gốc từ client            $originalFilename = $file->getClientOriginalName();
            // 3. Chuẩn bị các phần của tên file            $filenameWithoutExtension = pathinfo($originalFilename, PATHINFO_FILENAME); // Lấy tên file không có phần mở rộng            $extension = $file->getClientOriginalExtension(); // Lấy phần mở rộng            $directory = 'uploads'; // Thư mục lưu file trên disk            $disk = 'public'; // Disk sẽ sử dụng (được định nghĩa trong config/filesystems.php)
            // 4. Xác định tên file duy nhất            $finalFilename = $originalFilename; // Bắt đầu với tên gốc            $counter = 1;
            // Kiểm tra xem file đã tồn tại chưa            while (Storage::disk($disk)->exists($directory . '/' . $finalFilename)) {                // Nếu tồn tại, tạo tên mới với hậu tố 1,2,3,...                $finalFilename = $filenameWithoutExtension . '-' . $counter . '.' . $extension;                $counter++;            }
            // 5. Lưu file bằng storeAs với tên file mới            $storedFilePath = $file->storeAs($directory, $finalFilename, $disk); // Trả về đường dẫn tương đối: 'uploads/ten_file_cuoi_cung.jpg'
            return "File uploaded to: " . $storedFilePath;        }
        return "No file uploaded.";
    }
Kiểm tra thử: các file trùng tên sẽ được tự động thêm vào hậu tố 1,2,.. sau khi upload.
IV. Hiển thị file đã upload
Mực định, các file lưu trữ trong thư mục storage sẽ không thể truy cập trực tiếp từ trình duyệt vì lý do bảo mật. Để có thể hiển thị file đã lưu trong thư mục storage, chúng ta cần phải tạo symlink (cầu nối) bằng lệnh sau
php artisan storage:linkLệnh này sẽ tạo một liên kết từ public/storage → storage/app/public, giúp bạn truy cập file qua URL như http://xxxxx.com/storage/filename.jpg.
Cập nhật lại function store, bổ sung thêm phần chuyển hướng về lại trang gốc sau khi upload file, kèm theo các thông tin cần thiết: success, stored_path, original_filename
 public function store(Request $request)    {        // Tạo biến mới để lưu đường dẫn và tên file gốc        $storedFilePath = null;        $originalFilename = null;
        // Kiểm tra xem request có chứa file với tên là 'file' không        if ($request->hasFile('file')) {            // Lấy đối tượng file từ request            $file = $request->file('file');            // Lấy tên file gốc từ client            $originalFilename = $file->getClientOriginalName();
            // 3. Chuẩn bị các phần của tên file            $filenameWithoutExtension = pathinfo($originalFilename, PATHINFO_FILENAME); // Lấy tên file không có phần mở rộng            $extension = $file->getClientOriginalExtension(); // Lấy phần mở rộng            $directory = 'uploads'; // Thư mục lưu file trên disk            $disk = 'public'; // Disk sẽ sử dụng (được định nghĩa trong config/filesystems.php)
            // 4. Xác định tên file duy nhất            $finalFilename = $originalFilename; // Bắt đầu với tên gốc            $counter = 1;
            // Kiểm tra xem file đã tồn tại chưa            while (Storage::disk($disk)->exists($directory . '/' . $finalFilename)) {                // Nếu tồn tại, tạo tên mới với hậu tố 1,2,3,...                $finalFilename = $filenameWithoutExtension . '-' . $counter . '.' . $extension;                $counter++;            }
            // 5. Lưu file bằng storeAs với tên file mới            $storedFilePath = $file->storeAs($directory, $finalFilename, $disk); // Trả về đường dẫn tương đối: 'uploads/ten_file_cuoi_cung.jpg'        }
        // Chuyển hướng về trang trước đó        return back()->with('success', 'File uploaded successfully')            // Gửi kèm đường dẫn file đã lưu vào session flash data            ->with('stored_path', $storedFilePath)            // Gửi kèm tên file gốc vào session flash data            ->with('original_filename', $originalFilename);    }}
Cập nhật lại giao diện của upload.blade.php để hiển thị file ảnh đã upload
<!DOCTYPE html><html lang="en">
<head>    <meta charset="UTF-8">    <meta name="viewport" content="width=device-width, initial-scale=1.0">    <title>Upload File</title>    <script src="https://cdn.tailwindcss.com"></script></head>
<body class="bg-gray-100 font-sans antialiased">    <div class="container mx-auto mt-10 p-6 bg-white rounded-lg shadow-md max-w-md">        <h1 class="text-2xl font-bold mb-6 text-center text-gray-700">Upload File</h1>        <form action="{{ route("upload.store") }}" method="POST" enctype="multipart/form-data" class="space-y-4">            @csrf            <div>                <label for="file" class="block text-sm font-medium text-gray-700 mb-1">Choose file</label>                <input type="file" name="file" id="file"                    class="block w-full text-sm text-gray-500                              file:mr-4 file:py-2 file:px-4                              file:rounded-full file:border-0                              file:text-sm file:font-semibold                              file:bg-blue-50 file:text-blue-700                              hover:file:bg-blue-100" />            </div>            <button type="submit"                class="w-full bg-blue-500 hover:bg-blue-700 text-white font-bold py-2 px-4 rounded focus:outline-none focus:shadow-outline">                Upload            </button>        </form>    </div>
    {{-- Display Success Message and Uploaded File Info --}}    @if (session('success'))        <div class="container mx-auto mt-6 p-4 bg-green-100 border border-green-400 text-green-700 rounded-lg shadow-md max-w-md">            <p class="font-bold">Success!</p>            <p>{{ session('success') }}</p>
            @if (session('stored_path'))                <div class="mt-4">                    <p class="text-sm text-gray-600">Original Filename: {{ session('original_filename', 'N/A') }}</p>                    <p class="text-sm text-gray-600">Stored Path: {{ session('stored_path') }}</p>                    <img src="{{ session('stored_path') }}" alt="Uploaded Image" class="mt-2 rounded max-w-full h-auto border">                </div>            @endif        </div>    @endif
</body></html>
Kiểm tra thành quả, file sau khi upload thành công sẽ được hiển thị thành công trên trình duyệt.

V. Lời kết
Trong [Phần 1] của series File Upload trong Laravel này, mình đã hướng dẫn:
- Cách tạo form upload
- Xử lý upload trong controller
- Những lựa chọn lưu trữ file
- Hiển thị file đã upload
🔗 Mã nguồn
Toàn bộ mã nguồn sử dụng trong [Phần 1] này đã được mình đẩy lên Github, các bạn nào quan tâm có thể tham khảo ở đây: https://github.com/10h30/laravel-file-upload-series/tree/part-1-basic-upload
🔜 Phần 2: Validation & Bảo mật
Sau khi đã thực hiện thành công upload file cơ bản trong Laravel, bạn có thể thấy hệ thống vẫn đang “mở cửa tự do” cho người dùng:
- Cho phép upload bất kỳ định dạng nào
- Không giới hạn kích thước file
- Có thể tiềm ẩn rủi ro bảo mật nếu người dùng upload file độc hại
Trong [Phần 2], chúng ta sẽ tìm hiểu cách thêm validation cho file upload, đảm bảo chỉ cho phép các loại file được phép, hạn chế dung lượng và ngăn chặn các hành vi nguy hiểm từ phía người dùng.
Happy coding!