Đây là bài viết Phần 10 nằm trong series: Laravel File Upload
Chào mừng bạn đến với phần cuối cùng của series “Laravel File Upload“. Phần 10 này ra mắt chậm trễ hơn dự kiến, vì mình phải dành thêm thời gian nghiên cứu về Livewire 3 trước khi áp dụng vào series này.
Trong các phần trước, chúng ta đã từng bước xây dựng tính năng upload file trong Laravel – từ cơ bản, qua xử lý ảnh, tích hợp thư viện Spatie Media Library và cải thiện giao diện bằng FilePond. Tuy nhiên, ở phần cuối cùng này, chúng ta sẽ thử một hướng tiếp cận khác: sử dụng Livewire 3 để xây dựng tính năng upload file realtime – đơn giản, hiện đại và không cần JavaScript phức tạp.
Ưu điểm khi dùng Livewire 3:
- Upload realtime không cần reload trang.
- Tự động cập nhật danh sách file vừa upload.
- Giao diện đơn giản, dễ tuỳ biến.
- Tích hợp tốt với Spatie Media Library để lưu trữ và quản lý file.
Yêu cầu phải có kiến thức căn bản về Livewire 3, nếu không sẽ rất khó để theo dõi nội dung chia sẻ trong phần này.
Mục Lục
I. Cài đặt Livewire
Mình cài đặt Livewire bằng Composer
composer require livewire/livewireCode language: JavaScript (javascript)Tạo file app.blade.php trong thư mục resources\views\components\layouts với nội dung sau
<!DOCTYPE html>
<html lang="{{ str_replace('_', '-', app()->getLocale()) }}">
<head>
    <meta charset="utf-8">
    <meta name="viewport" content="width=device-width, initial-scale=1">
    <title>Livewire Component</title>
    <!-- Styles / Scripts -->
    <script src="https://cdn.tailwindcss.com"></script>
    @livewireStyles
</head>
<body>
    {{ $slot }}
    @livewireScripts
</body>
</html>Code language: HTML, XML (xml)II. Tạo Livewire Component
Tạo Livewire component UploadFile
php artisan livewire:component UploadFileCode language: CSS (css)Hệ thống sẽ tạo ra 2 file mới:
COMPONENT CREATED  🤙

CLASS: app/Livewire/FileUpload.php
VIEW:  resources/views/livewire/file-upload.blade.php
Code language: YAML (yaml)III. Chỉnh sửa Class FileUpload.php
Cách sử dụng Livewire 3 để Upload File được hướng dẫn đầy đủ trong documentation của Livewire 3 ở đây: https://livewire.laravel.com/docs/uploads
Class FileUpload.php tạm thời sẽ được cập nhật như sau
<?php

namespace App\Livewire;

use App\Models\Upload;
use Livewire\Attributes\Validate;
use Livewire\Component;
use Livewire\WithFileUploads;

class FileUpload extends Component
{
     use WithFileUploads;  // Sử dụng trait WithFileUploads để xử lý upload file trong Livewire.

    #[Validate(['files.*' => 'image|max:2048'])] // Thuộc tính Validate dùng để kiểm tra các file upload phải là hình ảnh và dung lượng tối đa 2MB cho mỗi file.
    public $files = [];  // Khai báo array cho danh sách các file được chọn upload.

    public $persistedUploads = []; // Khai báo array cho danh sách các file đã được upload thành công (được lưu trongatabase).

    /**
     * Lưu các file đã chọn vào thư mục lưu trữ và cập nhật cơ sở dữ liệu.
     *
     * @return void
     */
    public function save()
    {
        $this->validate();
        $uploadedFiles = $this->files;
        $numberOfFiles = count($uploadedFiles); // Đếm số lượng file đã upload

        foreach ($uploadedFiles as $file) {
            // Lấy tên file gốc từ client
            $originalFilename = $file->getClientOriginalName();
            $originalFilenames[] = $originalFilename; // Thêm tên gốc vào array

            // 3. Tạo bản ghi trong database cho model Upload:
            //    Lưu ý: Chúng ta chỉ cần lưu 'original_filename'.
            //    Các thông tin về đường dẫn file gốc và thumbnail sẽ do media-library quản lý.
            $uploadEntry = Upload::create([
                'original_filename' => $originalFilename,
            ]);

            // 4. Đây là phần quan trọng nhất - Thêm file vào Media Library:
            $uploadEntry->addMedia($file) // Thêm file vào Media Library
                ->toMediaCollection('images'); // Thêm file vào collection 'images'
        }

        $this->persistedUploads = Upload::latest()->get();
        $this->reset('files');
        session()->flash('success',  'You have successfully uploaded ' . $numberOfFiles . ' files');
    }

    /**
     * Xóa file đã upload khỏi thư mục lưu trữ và cơ sở dữ liệu.
     *
     * @param  \App\Models\Upload  $upload Model Upload cần xóa.
     * @return void
     */
    public function destroy(Upload $upload) {
        $upload->delete();
        $this->persistedUploads = Upload::latest()->get();
        session()->flash('success', 'You have successfully deleted ' . $upload->original_filename);
    }

    /**
     * Hàm được gọi khi component được khởi tạo.
     * Lấy danh sách các file đã upload từ cơ sở dữ liệu.
     *
     * @return void
     */
    public function mount()
    {
        $this->persistedUploads = Upload::latest()->get();
    }

    /**
     * Render view cho component.
     *
     * @return \Illuminate\Contracts\View\View
     */
    public function render()
    {
        return view('livewire.file-upload', [
            'uploads' => $this->persistedUploads
        ]);
    }
}


Code language: HTML, XML (xml)Giải thích
- Hàm
saveđược dùng để lưu thông tin file được chọn vào database và upload load file lên disk. - Hàm
destroyđược dùng để xóa thông tin file trong database và xóa file trên disk. - Hàm
updatePersistedUploadsdùng để cập nhật array$persistedUploads– lưu thông tin các file đã upload thành công.
IV. Chỉnh sửa layout file-upload.blade.php
Phần hiển thị giao diện của Livewire component được lưu trong file resources/views/livewire/file-upload.blade.php. Mình sử dụng layout của file layout.blade.php đã sử dụng trong các phần trước, chỉnh sửa lại cho phù hợp với yêu cầu của Livewire.
<div>
    {{-- Upload File Form --}}
    <div class="container mx-auto mt-10 p-6 bg-white rounded-lg shadow-md max-w-md">
        <h1 class="text-2xl font-bold mb-6 text-center text-gray-700">Upload File</h1>
        <form wire:submit.prevent="save">
            <div class="mb-4">
                <input type="file" wire:model="files" multiple>
            </div>

            <div class="mb-4">
            @error("files.*")
                <p class="text-red-500 text-xs mt-2">{{ $message }}</p>
            @enderror
            </div>

            <button type="submit"
                class="w-full bg-blue-500 hover:bg-blue-700 text-white font-bold py-2 px-4 rounded focus:outline-none focus:shadow-outline">
                Upload
            </button>
        </form>
    </div>

    {{-- Display Success Message --}}
    @if (session("success"))
        <div
            class="container mx-auto mt-6 p-4 bg-green-100 border border-green-400 text-green-700 rounded-lg shadow-md max-w-md">
            <p class="font-bold">Success!</p>
            <p>{{ session("success") }}</p>
        </div>
    @endif

    {{-- Display Uploaded File Info --}}
    @if (count($uploads) > 0)
        <div class="container mx-auto mt-10 p-10 bg-white rounded-lg shadow-md max-w-md">
            <h2 class="text-xl font-semibold mb-4 text-gray-700">Previously Uploaded Files:</h2>
            @foreach ($uploads as $upload)
                <ul>
                    <li class="flex items-center justify-between mb-4">
                        <a class="flex items-center gap-4 py-2" href="{{ $upload->url }}" target="_blank">
                            <img src="{{ $upload->thumbnail_url }}" alt="{{ $upload->original_filename }}"
                                width="50" height="50">
                            <span
                                class="text-sm text-gray-700 hover:text-blue-600">{{ $upload->original_filename }}</span>
                        </a>
                        <button
                            type="button"
                            onclick="if (confirm('Are you sure you want to delete this file?')) { @this.destroy({{ $upload->id }}) }"
                            wire:loading.attr="disabled"
                            class="bg-red-500 hover:bg-red-700 text-white font-bold py-2 px-4 rounded">
                            Delete
                        </button>

                    </li>
                </ul>
            @endforeach
        </div>
    @endif
</div>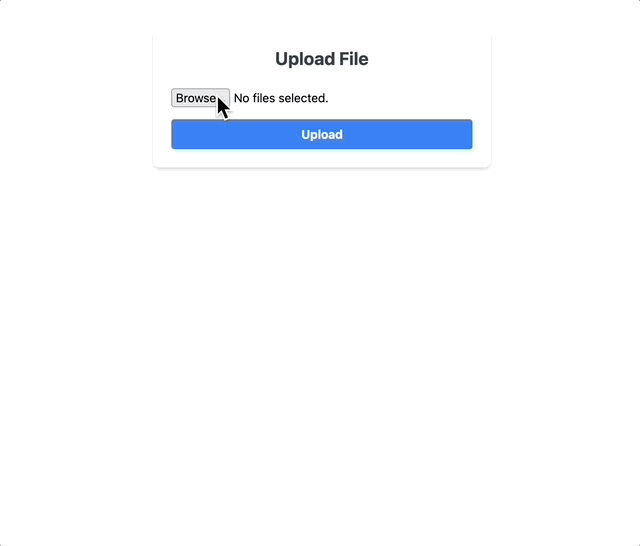
Code language: HTML, XML (xml)Phần upload form giờ đã được đơn giản hóa gọn gàng như bên dưới:
<form wire:submit.prevent="save">
    <input type="file" wire:model="files" multiple>
    @error('files.*') <span class="error">{{ $message }}</span> @enderror
    <button type="submit">Upload</button>
</form>Code language: HTML, XML (xml)Khi người dùng bấm nút Upload, form sẽ thực hiện function save được khai báo trong Class FileUpload.php.
Phần nút nhấn để xóa file không còn cần dùng tag <form>, mà có thể thao tác trực tiếp trên tag <button>
                       <button
                            type="button"
                            onclick="if (confirm('Are you sure you want to delete this file?')) { @this.destroy({{ $upload->id }}) }"
                            wire:loading.attr="disabled"
                            class="bg-red-500 hover:bg-red-700 text-white font-bold py-2 px-4 rounded">
                            Delete
</button>Code language: JavaScript (javascript)Khi người dùng bấm nút Delete, một hộp thoại yêu cầu xác nhận sẽ hiện ra. Nếu bấm đồng ý, hàm destroy trong Class FileUpload.php sẽ được thực thi để xóa thông tin file khỏi database và xóa file trên disk.
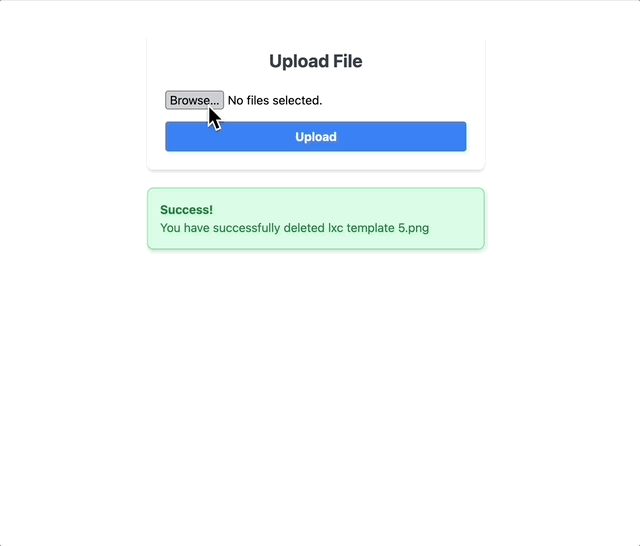
Kiểm tra thực tế, mọi thứ hoạt động đúng như mong muốn. Các thao tác upload file, hay xóa file đều diễn ra ngay lập tức trong trang hiện tại, không phải tải lại trang như thao tác ở các phần trước.
V. Cải thiện UX
Giao diện hiện tại vẫn chưa thật sự thân thiện: khi bấm upload hay delete, phải đợi 1-2 giây mới nhận lại được phản hồi từ trình duyệt, dễ khiến người dùng bối rối không biết hệ thống có đang xử lý đúng không.
Để khắc phục, chúng ta sử dụng tính năng Loading Indicator của Livewire 3. Cần bổ sung 2 phần khai báo wire:loading vào vị trí tương ứng của form upload và button delete
<div wire:loading wire:target="save">Uploading...</div>Code language: HTML, XML (xml) <div wire:loading wire:target="destroy({{ $upload->id }})" class="text-gray-500 text-sm">Deleting...</div>Code language: JavaScript (javascript)Ngoài ra, cần bổ sung thêm attribute wire:loading.attr="disabled" vào tag input và button để ngăn người dùng chọn file / xóa file trong khi hệ thống đang xử lý yêu cầu trước đó.
Tương tự như FilePond, Livewire 3 cũng hỗ trợ tính năng hiển thị ảnh thumbnail sau khi chọn file bằng cách sử dụng Temporary URL.
                 @if ($files)
                    @foreach ($files as $file)
                        <img src="{{ $file->temporaryUrl() }}">
                    @endforeach
@endifCode language: PHP (php)Toàn bộ file file-upload.blade.php giờ sẽ như sau
<div>
    {{-- Upload File Form --}}
    <div class="container mx-auto mt-10 p-6 bg-white rounded-lg shadow-md max-w-md">
        <h1 class="text-2xl font-bold mb-6 text-center text-gray-700">Upload File</h1>
        <form wire:submit.prevent="save">
            <div class="mb-4">
                 @if ($files)
                    @foreach ($files as $file)
                        <img src="{{ $file->temporaryUrl() }}">
                    @endforeach
                @endif
            </div>

            <div class="mb-4">
                <input type="file" wire:model="files" wire:loading.attr="disabled" multiple>
            </div>

            <div wire:loading wire:target="save">Uploading...</div>

            <div class="mb-4">
                @error("files.*")
                    <p class="text-red-500 text-xs mt-2">{{ $message }}</p>
                @enderror
            </div>

            <button type="submit"
                class="w-full bg-blue-500 hover:bg-blue-700 text-white font-bold py-2 px-4 rounded focus:outline-none focus:shadow-outline">
                Upload
            </button>

        </form>
    </div>

    {{-- Display Success Message --}}
    @if (session("success"))
        <div
            class="container mx-auto mt-6 p-4 bg-green-100 border border-green-400 text-green-700 rounded-lg shadow-md max-w-md">
            <p class="font-bold">Success!</p>
            <p>{{ session("success") }}</p>
        </div>
    @endif

    {{-- Display Uploaded File Info --}}
    @if (count($uploads) > 0)
        <div class="container mx-auto mt-10 p-10 bg-white rounded-lg shadow-md max-w-md">
            <h2 class="text-xl font-semibold mb-4 text-gray-700">Previously Uploaded Files:</h2>
            @foreach ($uploads as $upload)
                <ul>
                    <li class="flex items-center justify-between mb-4">
                        <a class="flex items-center gap-4 py-2" href="{{ $upload->url }}" target="_blank">
                            <img src="{{ $upload->thumbnail_url }}" alt="{{ $upload->original_filename }}"
                                width="50" height="50">
                            <span
                                class="text-sm text-gray-700 hover:text-blue-600">{{ $upload->original_filename }}</span>
                        </a>
                        <button type="button"
                            onclick="if (confirm('Are you sure you want to delete this file?')) { @this.destroy({{ $upload->id }}) }"
                            wire:loading.attr="disabled"
                            class="bg-red-500 hover:bg-red-700 text-white font-bold py-2 px-4 rounded">
                            Delete
                        </button>

                        <div wire:loading wire:target="destroy({{ $upload->id }})" class="text-gray-500 text-sm">
                            Deleting...
                        </div>
                    </li>
                </ul>
            @endforeach
        </div>
    @endif
</div>

Code language: JavaScript (javascript)Form upload bằng Livewire 3 giờ đã trực quan và thân thiện hơn hẳn so với trước đó.
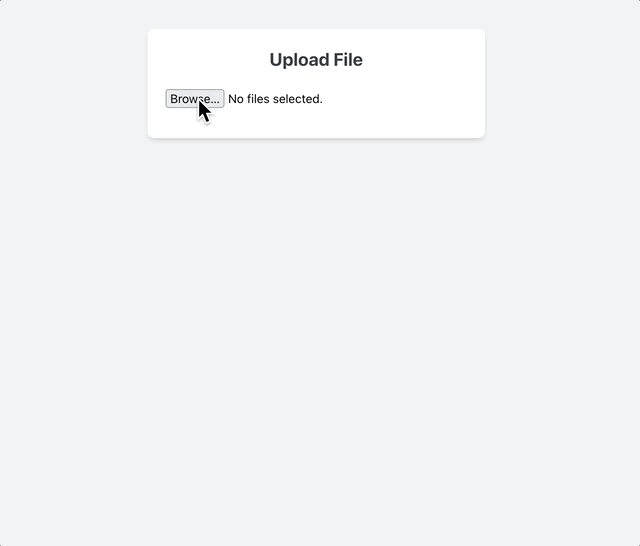
VI. Upload ngay sau khi chọn file
Chúng ta có thể upload file ngay sau khi chọn file mà không cần phải bấm nút Upload bằng cách sửa lại file file-upload.blade.php
- Bỏ phần khai báo
<form></form> - Bỏ luôn phần hiển thị thumbnai vì ảnh được upload ngay sau khi chọn, không còn cần phải xem thumbnail
- Bỏ
<button></button>vì không cần phải nhấn nút nữa.
  {{-- Upload File Form --}}
    <div class="container mx-auto mt-10 p-6 bg-white rounded-lg shadow-md max-w-md">
            <h1 class="text-2xl font-bold mb-6 text-center text-gray-700">Upload File</h1>

            <div class="mb-4">
                <input type="file" wire:model="files" wire:loading.attr="disabled" multiple>
            </div>

            <div wire:loading wire:target="files">Uploading...</div>

            <div class="mb-4">
                @error("files.*")
                    <p class="text-red-500 text-xs mt-2">{{ $message }}</p>
                @enderror
            </div>
</div>Code language: JavaScript (javascript)Bên file class FileUpload.php đổi tên hàm save thành updatedFiles, nội dung giữ như cũ
    public function updatedFiles()
    {
        $this->validate();
        $uploadedFiles = $this->files;
        $numberOfFiles = count($uploadedFiles); // Đếm số lượng file đã upload

        foreach ($uploadedFiles as $file) {
            // Lấy tên file gốc từ client
            $originalFilename = $file->getClientOriginalName();
            $originalFilenames[] = $originalFilename; // Thêm tên gốc vào array

            // 3. Tạo bản ghi trong database cho model Upload:
            //    Lưu ý: Chúng ta chỉ cần lưu 'original_filename'.
            //    Các thông tin về đường dẫn file gốc và thumbnail sẽ do media-library quản lý.
            $uploadEntry = Upload::create([
                'original_filename' => $originalFilename,
            ]);

            // 4. Đây là phần quan trọng nhất - Thêm file vào Media Library:
            $uploadEntry->addMedia($file) // Thêm file vào Media Library
                ->toMediaCollection('images'); // Thêm file vào collection 'images'
        }

        $this->updatePersistedUploads();
        $this->reset('files');
        session()->flash('success',  'You have successfully uploaded ' . $numberOfFiles . ' files');
    }
Code language: PHP (php)Hàm updatedFiles sẽ tự động được thực thi mỗi khi thuộc tính files được cập nhật – updated (khi người dùng chọn file).
VI. Lời kết
Sau gần 3 tuần chinh chiến, mình đã hoàn thành 10 phần khám phá cách xử lý file upload trong Laravel – bắt đầu từ các khái niệm cơ bản cho đến các kỹ thuật nâng cao như sử dụng Amazon S3, tạo thumbnail, tích hợp Spatie Media Library, FilePond và Livewire 3.
Trong phần cuối này, nhờ sự góp mặt của Livewire 3, tính năng upload đã được nâng cấp thân thiện hơn:
- Upload file ngay sau khi chọn, không cần nhấn nút “Submit”
- Hiển thị thông báo trong khi upload và xác nhận khi xóa file
- Cập nhật danh sách file theo thời gian thực
- Không cần phải reload lại trang mỗi khi upload hay xóa file
🔗 Mã nguồn
Tham khảo mã nguồn sử dụng trong [Phần 10] ở đây: https://github.com/10h30/laravel-file-upload-series/tree/part-10-livewire-upload
Mục đích của series này là để mình ôn lại kiến thức Laravel và học thêm những công cụ mới như Spatie Media Library, Livewire,.. Việc viết blog hướng dẫn vừa giúp mình hiểu sâu hơn, vừa có thể chia sẻ lại cho những bạn mới đang tìm hiểu về Laravel giống mình.
Trong tương lai, mình dự định sẽ thực hiện thêm nhiều series khác về Laravel và các công nghệ liên quan như Livewire, Alpine.js, Inertia, … Nếu bạn thấy hứng thú, hãy theo dõi blog thuanbui.me để không bỏ lỡ các bài viết tiếp theo nhé!
Cảm ơn bạn đã đồng hành đến cuối series!
Bạn đang xem loạt bài viết: Laravel File Upload
- Phần 1: File Upload trong Laravel – [Phần 1] Tạo form, xử lý file, lưu trữ file
- Phần 2: File Upload trong Laravel – [Phần 2] Kiểm tra và bảo vệ file upload form
- Phần 3: File Upload trong Laravel – [Phần 3] Upload cùng lúc nhiều file
- Phần 4: File Upload trong Laravel – [Phần 4] Hiển thị và xoá các file đã upload
- Phần 5: File Upload trong Laravel – [Phần 5] Upload file lên Amazon S3
- Phần 6: File Upload trong Laravel – [Phần 6] Temporary URL và Upload lên MinIO (self-hosted S3)
- Phần 7: File Upload trong Laravel – [Phần 7] Tạo thumbnail (ảnh thu nhỏ) với Intervention Image
- Phần 8: File Upload trong Laravel – [Phần 8] Quản lý ảnh nâng cao với Spatie Media Library
- Phần 9: File Upload trong Laravel – [Phần 9] Nâng cấp giao diện upload file với FilePond
- Phần 10: File Upload trong Laravel – [Phần 10] Upload file tự động với Livewire 3