Với các bài viết về kỹ thuật, đặc biệt là về lập trình, devops, việc hiển thị đoạn mã nguồn (code snippet) một cách rõ ràng và dễ đọc là cực kỳ quan trọng, giúp bạn đọc dễ theo dõi và dễ hiểu hơn.
Trong bài viết này mình sẽ giới thiệu về plugin Syntax-highlighting Code Block (with Server-side Rendering), hiện đang được sử dụng để làm nổi bật mã nguồn (syntax highlighting) khi viết bài trên blog.
Mục Lục
1. Vì sao mình chọn plugin này?
Trước đây mình đã thử qua nhiều plugin highlight code, nhưng đa phần các plugin yêu cầu phải dùng block riêng, không tương thích với block “Code” mặc định của Gutenberg. Mình không thích việc này, vì nếu đã lỡ dùng là “bị khóa” luôn, sau này muốn đổi plugin là phải đi chỉnh sửa lại tất cả các bài viết cũ.
Sau nhiều thử ngọn, mình đã chọn dùng plugin Syntax-highlighting Code Block (with Server-side Rendering) với các ưu điểm sau:
- Tương thích block “Code” mặc định của Gutenberg
- Plugin render mã màu trực tiếp phía server, giúp trang tải nhanh hơn.
- Gọn nhẹ: cài vào là hoạt động được ngay, không cần phải cấu hình Setting rườm rà gì cả.
- Dễ dàng mở rộng thông qua filter.
2. Cài đặt và sử dụng plugin
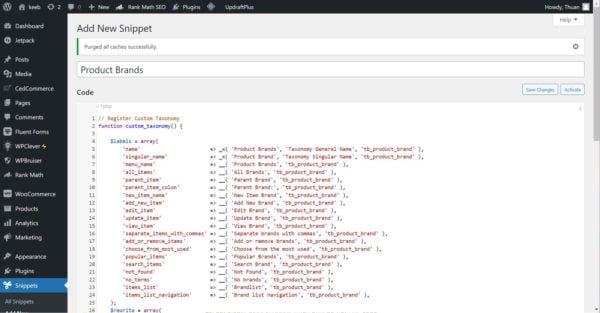
Vào Plugins → Add New trong trang quản trị WordPress, tìm plugin: Syntax-highlighting Code Block (with Server-side Rendering), cài đặt và kích hoạt.
Sau đó khi soạn thảo bài viết, sử dụng block Code để viết mã nguồn. Plugin Syntax-highlighting Code Block sẽ tự động làm đẹp đoạn mã này
Chẳng hạn bên dưới là 1 đoạn mã Python làm mẫu.
import sys

class TodoItem:
    def __init__(self, task):
        self.task = task
        self.completed = False

    def mark_done(self):
        self.completed = True

    def __str__(self):
        status = "✔" if self.completed else "✘"
        return f"[{status}] {self.task}"

class TodoList:
    def __init__(self):
        self.items = []

    def add(self, task):
        self.items.append(TodoItem(task))

    def list(self):
        if not self.items:
            print("No tasks found.")
        for idx, item in enumerate(self.items, start=1):
            print(f"{idx}. {item}")

    def mark_done(self, index):
        if 0 <= index < len(self.items):
            self.items[index].mark_done()
            print("Task marked as done.")
        else:
            print("Invalid task number.")

def print_menu():
    print("\nTodo List")
    print("1. Add task")
    print("2. View tasks")
    print("3. Mark task as done")
    print("4. Exit")

def main():
    todo = TodoList()
    while True:
        print_menu()
        choice = input("Enter choice: ").strip()
        if choice == "1":
            task = input("Enter task: ")
            todo.add(task)
        elif choice == "2":
            todo.list()
        elif choice == "3":
            todo.list()
            index = int(input("Enter task number to mark done: ")) - 1
            todo.mark_done(index)
        elif choice == "4":
            print("Goodbye!")
            sys.exit()
        else:
            print("Invalid option.")

if __name__ == "__main__":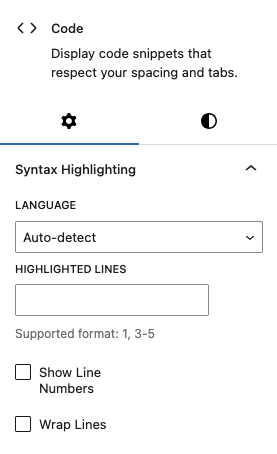
main()Code language: Python (python)Thông thường, plugin sẽ tự động nhận dạng ngôn ngữ đang sử dụng trong block. Bạn có thể tự thiết lập bằng cách cấu hình thông số cho từng block. Ngoài chọn ngôn ngữ, có thể tùy chọn thêm các tính năng như đánh dấu các dòng cần làm nổi bật, hiển thị số dòng,…
3. Bổ sung nút “Copy”
Mặc định, plugin Syntax-highlighting Code Block không hỗ trợ nút bấm Copy (Copy to Clipboard) để có thể sao chép toàn mã nguồn chỉ với 1 cái click. Tuy nhiên, chúng ta có thể mở rộng plugin thông qua hàm add_filter để tạo thêm nút Copy.
Tác giả của plugin có cung cấp mã nháp cho nút Copy ở đây: https://gist.github.com/westonruter/d99067473ad799deb099334a70bdf336
Mình đã tùy biến lại cho phù hợp với nhu cầu sử dụng: Hiển thị nút Copy, sau khi bấm nút Copy sẽ hiện ra chữ Copied to Clipboard, và nó sẽ biến mất sau vài giây.
Thêm đoạn code sau vào file functions.php của theme (hoặc qua plugin Code Snippets)
add_filter('render_block', 'render_block_copy_button', 10, 2);

function render_block_copy_button( $content, $block ) {
	if ( 'core/code' !== $block['blockName'] || empty( $block['innerHTML'] ) ) {
		return $content;
	}

	// Get the code content and prepare JavaScript
	$code = wp_strip_all_tags( $block['innerHTML'] );
	$copy_icon = '<svg xmlns="http://www.w3.org/2000/svg" width="16" height="16" viewBox="0 0 24 24" fill="none" stroke="currentColor" stroke-width="2" stroke-linecap="round" stroke-linejoin="round"><rect x="9" y="9" width="13" height="13" rx="2" ry="2"></rect><path d="M5 15H4a2 2 0 0 1-2-2V4a2 2 0 0 1 2-2h9a2 2 0 0 1 2 2v1"></path></svg>';
	$check_icon = '<svg xmlns="http://www.w3.org/2000/svg" width="16" height="16" viewBox="0 0 24 24" fill="none" stroke="currentColor" stroke-width="2" stroke-linecap="round" stroke-linejoin="round"><path d="M20 6L9 17l-5-5"></path></svg>';
	$js = "try { navigator.clipboard.writeText(this.getAttribute('data-code')); this.classList.add('copied'); this.innerHTML = '$check_icon'; const msg = this.nextElementSibling; msg.style.display = 'inline-block'; msg.style.opacity = '1'; setTimeout(() => { this.classList.remove('copied'); this.innerHTML = '$copy_icon'; msg.style.transition = 'opacity 0.5s'; msg.style.opacity = '0'; setTimeout(() => { msg.style.display = 'none'; }, 500); }, 1000); } catch (e) { this.classList.add('error'); setTimeout(() => this.classList.remove('error'), 1000); }";

	// Create the button with SVG icon and message span
	$button = sprintf(
		'<button class="code-copy-button" data-code="%1$s" onclick="%2$s" title="%3$s">%4$s</button><span class="copy-message" style="display: none;">%5$s</span>',
		esc_attr( $code ),
		esc_attr( $js ),
		esc_attr__( 'Copy code to clipboard', 'text-domain' ),
		$copy_icon,
		esc_html__( 'Copied to clipboard', 'text-domain' )
	);

	// Wrap content and button in a container with relative positioning
	$wrapped_content = sprintf(
		'<div class="code-block-wrapper" style="position: relative;">%s%s</div>',
		$content,
		$button
	);

	return $wrapped_content;
}Code language: HTML, XML (xml)Đồng thời bổ sung css này vào style.css của theme (hoặc dùng các plugin Custom CSS)
.code-block-wrapper {
	position: relative;
}

.code-copy-button {
	position: absolute;
	top: 8px;
	right: 8px;
	padding: 6px;
	background-color: #FFF;
	cursor: pointer;
	color: #0e61aa;
	display: flex;
	align-items: center;
	justify-content: center;
	width: 30px;
	height: 30px;
}

.code-copy-button:hover,
		.code-copy-button:focus {
	background-color: #0e61aa;
	border-color: #FFF;
}

.code-copy-button.copied {
	background-color: #0e61aa;
	border-color: #FFF;
	color: #FFF;
}

.code-copy-button.error {
	background-color: #f8d7da;
	border-color: #f5c6cb;
}

.code-copy-button svg {
	width: 16px;
	height: 16px;
}

.copy-message {
	position: absolute;
	top: 8px;
	right: 42px;
	background-color: #FFF;
	color: #0e61aa;
	padding: 4px 8px;
	border-radius: 4px;
	font-size: 12px;
	white-space: nowrap;
	z-index: 10;
	display: none;
	opacity: 0;
	line-height: 20px;
}Code language: CSS (css)Các bạn có thể xem demo trực tiếp trên các block code trong bài này.
4. Highlight code trong comment
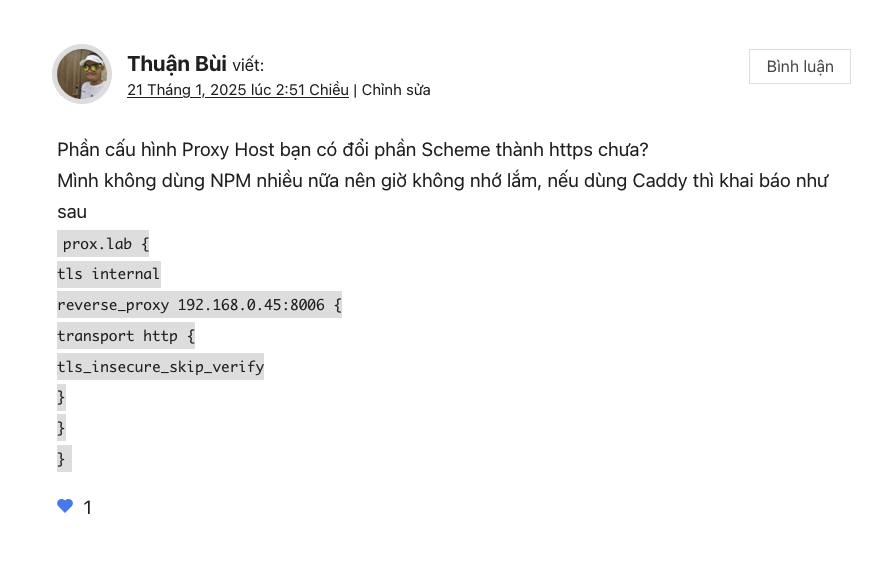
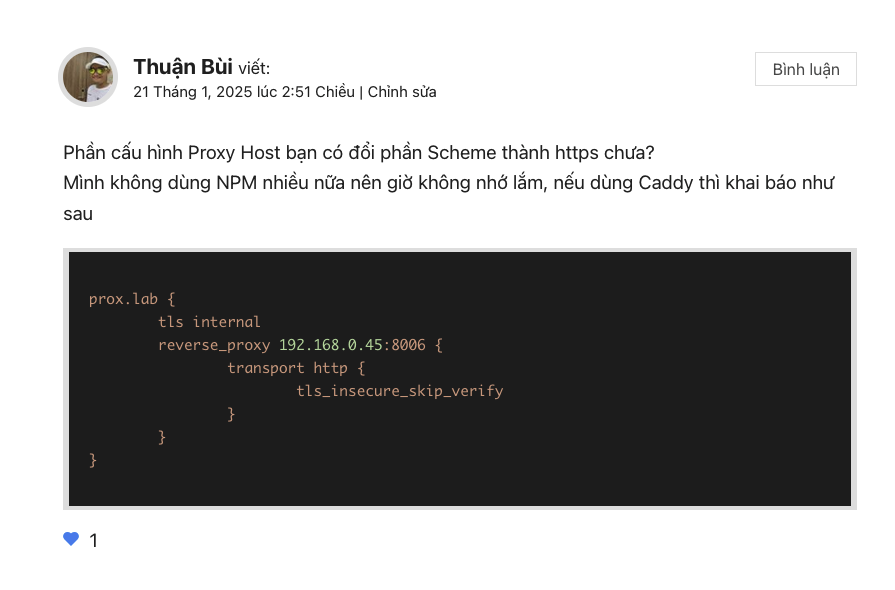
Đa số các plugin syntax highlighting chỉ hỗ trợ làm nổi bật mã nguồn trong bài viết, không hoạt động với mã nguồn trong comment. Ví dụ bên dưới là 1 comment của mình có code, nhìn không trực quan tí nào.
Plugin Syntax-highlighting Code Block hỗ trợ highlight các đoạn mã nguồn được chia sẻ trong phần comment bằng cách bổ sung snippet
function filter_comment_text( $comment_text ) {
	if ( ! function_exists( '\Syntax_Highlighting_Code_Block\render_block' ) ) {
		return $comment_text;
	}

	$registry   = WP_Block_Type_Registry::get_instance();
	$block_type = $registry->get_registered( 'core/code' );
	if ( ! $block_type instanceof WP_Block_Type ) {
		return $comment_text;
	}

	$attributes = [];
	foreach ( $block_type->attributes as $name => $schema ) {
		if ( isset( $schema['default'] ) ) {
			$attributes[ $name ] = $schema['default'];
		}
	}

	$pattern = implode(
		'',
		[
			'(?<=^|\n)',
			'(<pre[^>]*?>\s*)?',
			'<code[^>]*?>(?P<contents>[^<]*?)</code>',
			'(\s*</pre>)?',
			'(?=\r?\n|$)',
		]
	);

	return preg_replace_callback(
		"#{$pattern}#si",
		static function( $matches ) use ( $attributes ) {
			$contents = $matches['contents'];
			$before   = '<pre><code>';
			$after    = '</code></pre>';
			return \Syntax_Highlighting_Code_Block\render_block( $attributes, $before . $contents . $after );
		},
		$comment_text
	);
}

add_filter( 'comment_text', __NAMESPACE__ . '\filter_comment_text', 20 );Code language: PHP (php)Nguồn tham khảo: https://gist.github.com/westonruter/d35a909df087d90e0100d111eed77faa
Phần code trong comment của mình giờ đã hiển thị xinh đẹp hơn nhiều.
5. Lời kết
Plugin Syntax-highlighting Code Block (with Server-side Rendering) là một lựa chọn lý tưởng dành cho các bạn
- Đang viết blog kỹ thuật trên WordPress.
- Muốn giữ workflow đơn giản với block mặc định của Gutenberg.
- Ưu tiên tốc độ, hiệu năng và sự gọn nhẹ.
Hẹn gặp lại!